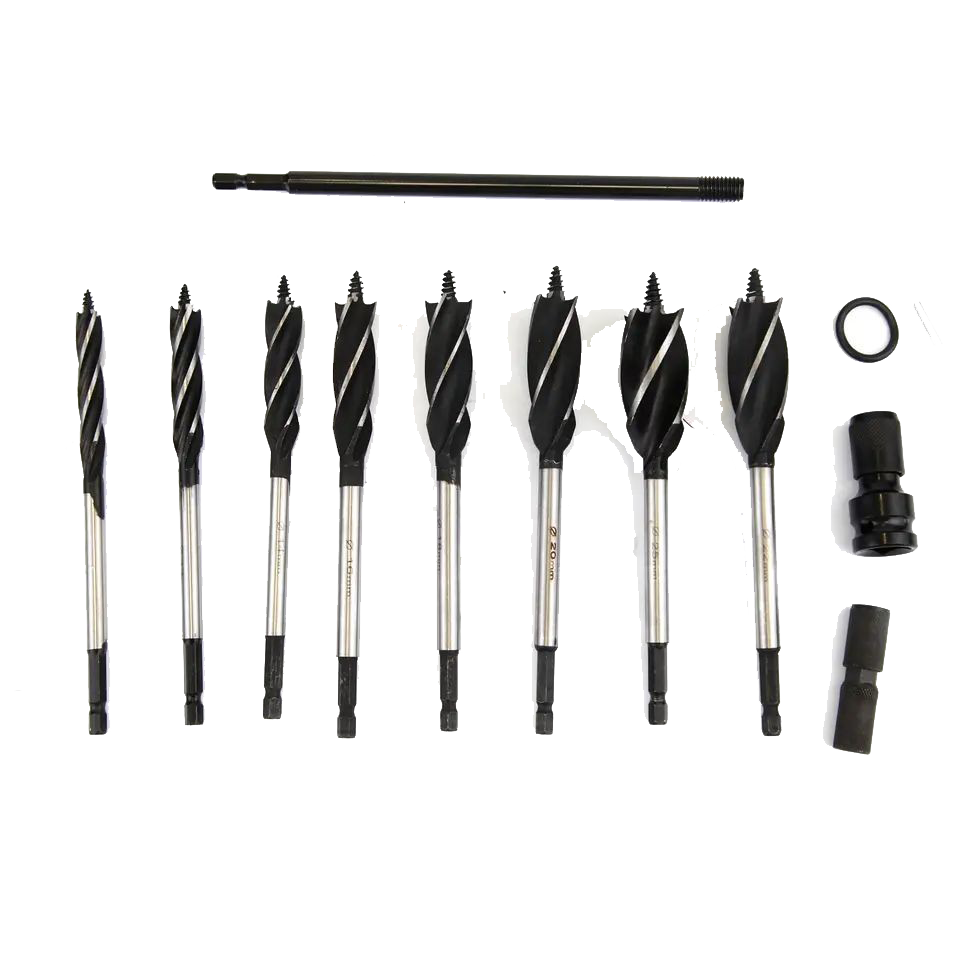
Product Overview
An auger bit set sits in a different place in the toolbox from a twist drill set. Twist bits make small, accurate holes in thin material and in metal. Auger bits make deep holes in timber, fast, and they are the bits framers, electricians, plumbers and joiners actually wear out. The four-flute format in this set is the modern version of the classic wood auger: it keeps the self-feeding screw point that made the auger quick, and it adds the extra cutting lips, channels and web stiffness that make it accurate and controllable in a hand-held drill.
Three things define the product. The lead screw sets the feed rate mechanically, so the bit advances at a rate the thread decides rather than a rate your arm decides — which is why an auger cuts so much faster than a spade bit in deep timber and why it needs so little pressure. The four flutes are chip channels: they keep the cutting zone clear so the lips cut wood rather than re-cut their own shavings. The spurs are the two small points at the rim that score the circumference before the lips arrive, and they are the reason an auger throws a clean-edged hole rather than a splintered one.
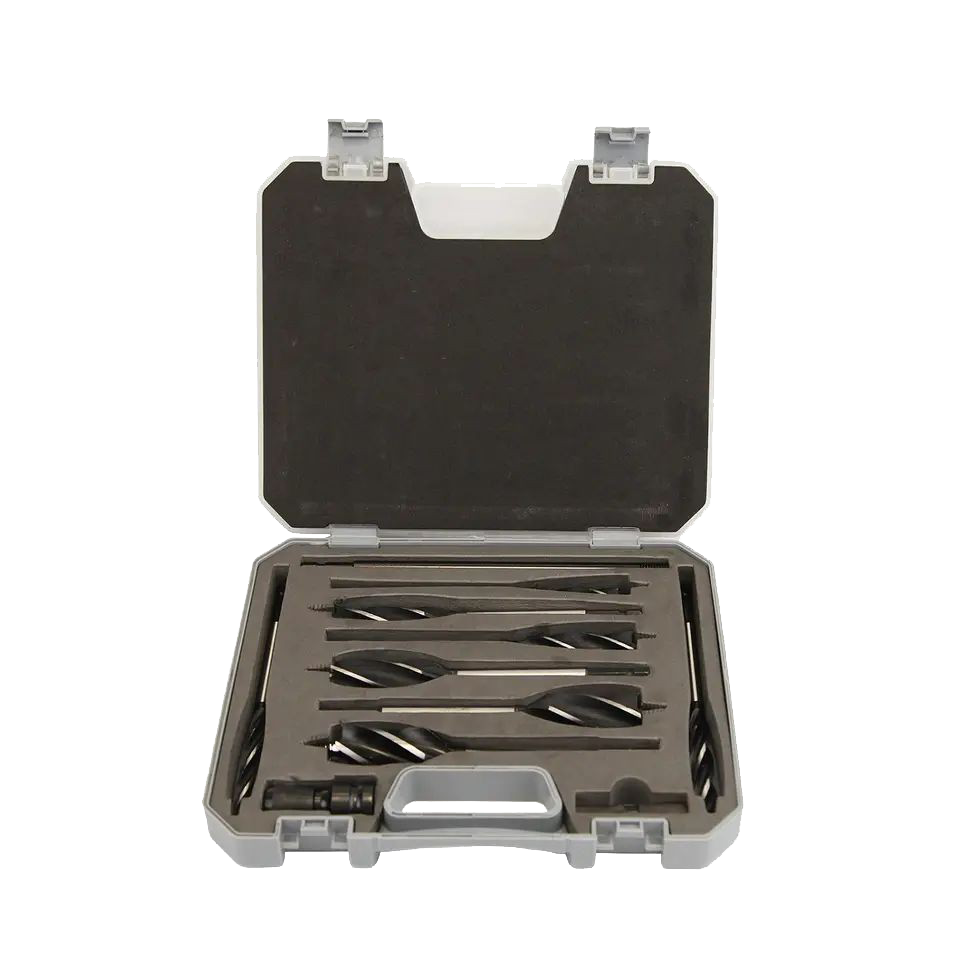
The set is supplied with the accessories that turn a range of bits into a boring system: a screw-on extension bar that extends the reach past the length of the longest bit, and a quick-change hex adapter that lets every diameter share one chuck. Bits are high carbon steel, hardened and tempered, with a black oxide flute finish that carries a light oil film and resists rust in a damp toolbox.
Who this set is for: framing and rough-in crews boring studs, top plates, joists and rafters for cable and pipe; joiners and furniture makers drilling dowel, bolt and fixing holes; deck and fence builders; maintenance departments that want one case to cover the common range; and distributors who want a wood-boring SKU that complements a woodworking or power-tool accessory range under their own brand.
Where it sits in the range: this set is the deep boring option. If the job is a flat-bottomed hinge recess, you want the Forstner bit set; for a fast rough through-hole where the rim does not matter, the flat (spade) bit set; for a large opening for a lock, a downlight or a pipe, the wood hole saw set. The comparison table further down sets all of them side by side.
How the Bit Bores: Screw Point, Flutes, Spurs
Four features do all the work, and each of them has a failure mode you can recognise on site.
The lead screw sets the feed rate, not your arm
The threaded point is the defining feature of an auger bit and the thing that separates it from every other wood bit. It behaves like a wood screw: it bites into the timber and pulls the bit into the work at a rate fixed by the thread pitch, broadly one pitch of advance per revolution. The practical consequence is that an auger bit cuts with almost no downward pressure. Push on it and you are not making it cut faster, you are loading a screw that is already advancing itself — which is what stalls a small drill and what makes a big one snatch. Let the thread do the pulling and the bit will walk into the timber on its own.
The same mechanism explains the one moment that catches everybody: break-through. As long as the screw point is embedded in timber it is pulling at a controlled rate. The instant it pops out of the far face the pulling stops, and the only thing still feeding the bit is you. If you are leaning on the drill, that is the point where the bit lunges and takes the drill with it.
Four flutes instead of one deep spiral
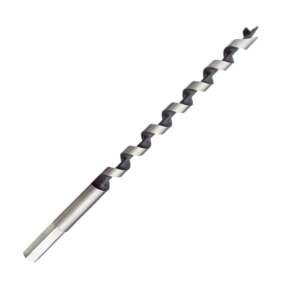
A traditional wood auger, a ship auger and an electrician’s bell-hanger bit all use a single deep continuous spiral. That geometry exists for one reason: to carry chips a long way out of a very deep hole. On a bit that has to bore 450 to 900 mm through a wall cavity, a single deep channel is exactly right. A four-flute bit gains different things. Four lips share the cutting load, so the bit stays balanced. Four separate channels each have a shorter path to the surface, so chips leave quickly and the cutting zone stays clear. And the extra web makes the body stiffer, so the bit resists bending and keeps its diameter through the cut — which is why a four-flute bit in a hand drill tends to start where you aimed it instead of skating across the timber.
Where the four-flute format gives ground is at real depth, above roughly 200 mm: a single deep spiral still carries chips further in one sweep, and in very deep softwood a ship auger will clear better. Below that depth — which is where almost all framing, joinery and rough-in work lives — the four-flute bit is the faster, more accurate, easier tool.
Two spurs, and why the-hole-edge needs them
At the rim of the bit there are two small raised points, one on each side. These are the spurs, and they run slightly ahead of the main cutting lips. Their job is to score the circumference of the hole before the lips lift the wood away, so the fibres at the rim are cut rather than bent and torn. On a clean, sharp bit the hole comes out with a crisp edge and you can see the ring the spurs made. When the spurs go blunt — and they go blunt first, because they are the most delicate part of the bit — the symptom is immediate: the hole edge starts to ravel, the surface grain splinters around the rim, and the entry looks chewed even though the hole itself is the right diameter.
Reading the chips
Three states, three diagnoses. Long curly shavings, bit advancing with light pressure, no burning smell — the bit is sharp and running at about the right speed. Fine dust rather than shavings, a hot smell, a glazed-looking hole wall, and the need to push — the bit is dull, or it is running too fast, or both; a sharp bit at the right speed makes shavings, never dust. The bit will not pull itself in, and needs firm pressure to advance — the lead screw is blunt or damaged, and once that happens the bit’s self-feeding advantage is gone and it should be replaced. A screw point cannot be resharpened, so this is the failure that retires the bit.
Which Diameter for Which Hole
The reason to buy the set rather than one bit is that the required hole size is dictated by what is going through it, and those sizes cluster into a few bands. Below is what the diameters in this range are actually for, and the numbers come from the code and trade practice, not from preference.
| Bit diameter | Imperial equivalent | What it is for | The rule that sets it |
|---|---|---|---|
| 10 mm | 3/8″ | Dowel holes, plug holes, pilot for small fixings, cable clips | Bit diameter matched to the dowel, not to the hole |
| 12 mm | 15/32″ | Cabinet dowels, small bolt holes, pilot for a 1/2″ lag | Pilot ≈ shank diameter of the fastener |
| 14 mm | 9/16″ | Clean clearance hole for a 1/2″ bolt or threaded rod | Clearance = bolt diameter + about 1.5 mm |
| 16 mm | 5/8″ | Single 14/2 cable run through a stud | NEC 300.4 edge distance; 5/8″ is the trade minimum |
| 19 mm | 3/4″ | Single 12/2 cable run; the electrician’s default | Extra clearance makes the pull easier and protects the jacket |
| 20 mm | 25/32″ | Furniture bolts, bed-bolt holes, larger dowels | Clearance hole for M16 / 5/8″ hardware |
| 22 mm | 7/8″ | 1/2″ PEX or copper plumbing run | Pipe must not be trapped tight; allow for expansion |
| 25 mm | 1″ | 10/2 cable, conduit stub through a plate, two small cables | 1″ is about the practical maximum in a 2×4 |
| 28 mm | 1-1/8″ | Multiple cable bundles, small pipe runs | Only in doubled or non-load-bearing members |
| 32 mm | 1-1/4″ | Large pipe runs, 8/3 cable, deep beams and posts | Check the 40% rule before boring any stud this size |
The two framing rules that decide whether the hole is legal
Both come from the National Electrical Code and from structural practice, and both are easy to violate with a big bit and a good drill.
The 1-1/4 inch rule. Under NEC 300.4, a hole for non-metallic sheathed cable must be bored so that the edge of the hole is at least 1-1/4 inches from the nearest edge of the wood member. The reason is drywall screws and finish nails: inside that margin, a screw driven into the face of the stud can reach the cable. If the geometry of the member makes the clearance impossible, the cable must be protected by a steel plate at least 1/16 inch thick over the zone where the clearance is short. Centre the hole in a 3-1/2 inch 2×4 and you comply by default.
The 40 percent rule. In a load-bearing stud, the bored hole should not exceed 40 percent of the member width — for a nominal 2×4 that is about 1-3/8 inches, which is why 1 inch is treated as the sensible ceiling and why a 32 mm bit belongs in a doubled stud, a beam or a joist rather than in a single stud. Notching is treated more harshly than boring, at 25 percent, because a notch removes material on the edge where the bending stress is highest, while a centred hole removes material where the stress is lowest. If the choice is between boring and notching, bore.
Drilling into a joist: keep the hole in the middle third of the depth, never in the top or bottom quarter where the flanges carry the tension and compression, and never within about 50 mm of the bearing end. The engineering reason is that the flanges are doing the work and the middle is mostly along for the ride — which is exactly why the codes allow a hole there and not a notch.
Full Specifications
| Product type | Four-flute wood auger / boring bit set with self-feeding screw point |
|---|---|
| Set contents (options) | 6-piece, 8-piece and 12-piece configurations; contents confirmed to order |
| Diameter range | 10, 12, 14, 16, 18, 19, 20, 22, 24, 25, 26, 28, 30, 32 mm (3/8″–1-1/4″); full range 6–38 mm on request |
| Flutes | 4 cutting lips, 4 chip channels |
| Point | Threaded lead screw (self-feeding) with 2 rim spurs |
| Overall length | 165 mm standard (approx. 125 mm working length); other lengths to order |
| Shank | 1/4″ (6.35 mm) hex, quick-change compatible; 7/16″ hex on larger diameters |
| Material | High carbon steel, hardened and tempered |
| Finish | Black oxide flute finish; bright shank |
| Extension bar | Screw-on extension included; length to suit the set |
| Adapter | Hex quick-change adapter included |
| Case | Blow-moulded case with moulded slots for bits and accessories |
| Recommended speed | Approx. 500–1,500 rpm; lower for large diameters and dense hardwoods |
| Recommended machine | Corded drill from approx. 800 W, or cordless 48 V class and above, for the larger diameters |
| Materials drilled | Hardwood, softwood, timber framing, plywood, MDF, chipboard, plastics, plasterboard |
| Not for | Masonry, concrete, brick, metal, or any timber that may contain nails or staples |
| Packaging | Blow-moulded case, printed sleeve, colour box, carton; custom packaging to order |
| MOQ | 100 sets standard; 500 sets for custom set contents, finish, marking or packaging |
| Lead time | 5–10 days standard; 15–30 days for custom production after deposit |
| Payment terms | T/T, L/C, D/A, D/P, PayPal |
| Loading port | Shanghai or Ningbo |
| OEM / ODM | Welcome — your brand, artwork, case colour and packaging |
Prices run roughly US$4–28 per set depending on set size, diameters, shank type and packaging. Tell us the material, the hole diameters and the volumes and we will quote the set that fits rather than the one that happens to be closest.
Wood Boring Bits Compared
There are five families of wood bit and they are not interchangeable. Choosing wrongly is the usual reason a job takes three times as long, or a hole comes out spoiled. This table is the honest scope of each.
| Dimension | Auger bit (this set) | Spade / flat bit | Forstner bit | Hole saw | Brad-point bit |
|---|---|---|---|---|---|
| Size range | 6–38 mm | 16–50 mm | 10–100 mm | 25–200 mm | 3–25 mm |
| Hole quality | Good; clean rim thanks to the spurs | Fair; torn rim, rough wall | Excellent; smooth wall, flat bottom | Good; clean rim, core left intact | Excellent; crisp rim |
| Depth | 200 mm and beyond, with the extension bar | Roughly 150 mm | About 75 mm | Limited by cup depth, about 50 mm per pass | Limited by flute length |
| Speed | Fast, self-feeding | Fastest in softwood | Slow | Medium | Fast in small diameters |
| Typical speed | 500–1,500 rpm | 600–1,500 rpm | 250–1,000 rpm | 200–600 rpm | 1,000–3,000 rpm |
| Best for | Deep structural holes, rough-in, joinery bolts | Fast rough through-holes, cable runs | Hinge cups, flat-bottom and angled holes | Locksets, downlights, pipe penetrations | Cabinetry, dowels, furniture |
| Weakness | Snatches at break-through; not for nails | Tears the rim; wanders in hardwood | Needs a drill press; burns if run fast | Only through-holes, no flat bottoms | Not for large or deep holes |
| Relative cost | Moderate | Lowest | Highest | Moderate, per cup | Low |
The rule that keeps you out of trouble: if the hole is deep and hidden, auger. If the hole is shallow, large and rough, spade. If the hole has to look good or has a flat bottom, Forstner. If the hole is a big circle for hardware or a pipe, hole saw. If the hole is small, visible and precise, brad-point. Most crews own all five in some form, and the reason is that no single geometry covers the range.
Why not just use a spade bit for everything? Because a spade bit in deep timber packs its chips in front of the cutting edge, which means you are constantly withdrawing it to clear, and because its flat blade wanders in hardwood and tears the exit face on any visible work. On a 19 mm hole 100 mm deep in oak, an auger bit will finish in a fraction of the time a spade bit takes — the screw point pulls it in, and the four flutes keep the hole clear while it does. For joinery and visible work the difference is larger still, because the spurs cut the rim instead of grinding it.
Shank, Extension Bar and Quick-Change
The hex shank does two jobs
A 1/4 inch hex shank is the de facto standard for wood and screwdriver accessories, and it earns its place twice over. In a three-jaw chuck it gives the jaws flat faces to grip instead of a round barrel, which stops the bit spinning under load — the failure that ruins a round-shank bit on a big hole. In a quick-change holder it drops in and locks with a collar, so a crew can move from one diameter to the next without stopping to open the chuck. Larger diameters in the range carry a 7/16 inch hex for the same reason, with more torque capacity where the load is higher.
What the extension bar is for
The extension bar screws onto the shank of a bit, in effect lengthening it. It exists for one common problem: the hole is deeper than the bit is long. That happens more often than people expect — boring through a rim joist plus its cladding, through two studs back to back after a wall has been built out, through a post into the beam behind it, or clearing a cable route where the drill body cannot physically get close enough to the work because something is in the way. A screw-on extension solves all of these, and it is the single accessory that turns a set of bits into a boring system.
An extension makes the bit less rigid, so run it slower. Any extra length between the chuck and the cutting edge is a lever, and a lever amplifies run-out. With the extension fitted, drop the speed, feed with even less pressure than usual, and accept that the hole may run slightly off if you lean on it. Clear the chips more often, because the longer path makes packing more likely.
Power: the number that decides whether it stalls
An auger bit boring a large hole takes real torque, and the limiting factor on most sites is not the bit but the drill behind it. As a working guide, the larger diameters in this set want a cordless drill of around 48 V class or above, or a corded drill of about 800 W or more. Below that, the bit tends to stall and stick in the timber, and a stalled auger is awkward to free — the screw point is still holding, so you cannot simply reverse out without dragging the chips back into the cut. If your machine is marginal, take the hole up in steps rather than forcing it in one pass, and clear chips between steps.
Speed, Feed and Break-Through
Speed: slower than a twist bit, and slower again as the diameter grows
What matters is not the spindle speed but the speed at the rim of the bit, and the rim speed rises with diameter at the same rpm. That is why the rule is always the same in wood: small bits fast, big bits slow. A workable band for this range is roughly 500 to 1,500 rpm, with large diameters and dense hardwoods at the bottom of the band and small diameters in softwood at the top.
| 10–13 mm | 1,200–1,800 rpm in softwood; about 1,000 rpm in hardwood |
|---|---|
| 14–19 mm | 900–1,400 rpm softwood; 700–1,000 rpm hardwood |
| 20–25 mm | 700–1,100 rpm softwood; 550–800 rpm hardwood |
| 26–32 mm | 500–800 rpm softwood; 400–600 rpm hardwood |
| With extension bar | Reduce by roughly 25–30% to control run-out |
| Very dense hardwoods | Reduce the hardwood figures by a further third |
The signal that you are too fast is heat: a scorched smell, a polished-looking hole wall, and dust instead of shavings. Heat is what dulls a wood bit — the edge loses its temper long before it wears out mechanically — so running a bit cool is the cheapest way to make it last.
Feed: let the screw pull
Apply only enough pressure to keep the screw point engaged and the bit guided, and no more. On a sharp bit in softwood that is barely any pressure at all: the thread does the work. Two things follow. First, a bit that needs pushing is telling you something — a blunt screw point, a blunt lip, or too much speed — and the answer is to fix the cause rather than push harder. Second, an auger bit cuts best when the drill is held square to the work and allowed to advance at its own pace; levering the drill sideways to steer the hole binds the shank against the wall and burns the edge.
Break-through is the moment that bites back
This is the single biggest difference between an auger bit and every other wood bit, and it is the one thing to brief a new operator on. While the screw point is embedded, the bit advances at a controlled rate. The moment the point exits the far face, the self-feeding stops and the feed rate is suddenly set by how hard you are leaning on the drill — which, if you have been pushing, is a lunge. Three defences, used together:
- Ease off the trigger as the point approaches the exit. You can see it on a through-hole from the side, and you can feel the change in resistance when the thread loses purchase.
- Clamp a scrap board hard against the far face. The bit then cuts into the scrap, the screw point keeps its purchase, and the exit edge of the real workpiece is supported and clean. This is also the only reliable way to avoid blow-out on veneered ply, melamine and laminate.
- Or drill from both sides. Bore until the point just breaks through, then come in from the opposite face to meet the first hole. The breakout is halved because each side gets the supported cut.
Chip clearance at depth
Four flutes clear chips well, but no bit clears them forever. At depth, use a peck cycle: bore roughly 25 to 30 mm, withdraw fully, let the flutes empty, then go back in. Do not rely on reversing at speed to clear — the screw point drags the chips back down the hole and you simply re-cut them. On deep holes in resinous softwood the chips can also become sticky; if the bit starts to feel tight, stop and clear rather than adding pressure, because a bit that packs solid is a bit that has to be extracted.
Sharpening, Wear and Storage
An auger bit has three working features and only two of them can be maintained. Knowing which is which is the difference between a bit that lasts years and a bit that is thrown away at the first sign of trouble.
What you can sharpen: the lips and the spurs
The cutting lips are dressed on their inside face with a fine file or a small grinding wheel, keeping the original bevel angle and removing the minimum of material. Dress both lips equally or the bit will cut off-centre and bore oversized. The spurs are touched up on their inside edge only, lightly, because their outside face defines the hole diameter and any material removed there makes the hole undersize. Between them, those two operations will bring most tired bits back to full performance in a couple of minutes.
What you must not touch: the lead screw
The threaded point is a precision thread whose pitch sets the feed rate. File it, flatten it or round it off and you change the thread the timber is trying to follow: the bit stops self-feeding, starts needing to be pushed, and then burns and stalls. There is no field repair for a damaged screw point, and a bit with a blunt screw point is effectively finished even if its lips are still sharp — because the whole reason to own an auger bit is the self-feeding.
The three ways a bit retires
| Spurs rounded or chipped | Hole edge ravels, entry rim splinters, hole looks chewed. Re-dress the spurs; if the tip is gone, replace. |
|---|---|
| Lips blunt | Needs pressure, runs hot, makes dust instead of shavings, hole wall burnished. Dress the lips; replace when the relief is used up. |
| Screw point blunt or damaged | Will not pull itself in; requires pushing; stalls. Not repairable — replace the bit. |
| Bent shank | Visible run-out and an oversized, out-of-round hole. Caused by levering the drill or dropping the bit. Replace. |
Storage
Keep the set in its case, with the bits in their own slots. Loose bits roll against each other in a toolbox and the spurs — the most delicate feature — chip against whatever they touch. A light wipe of oil after use keeps the black oxide finish working and stops rust in a damp van or a cold workshop; the black finish alone is a rust barrier, not a rust guarantee, and a rusted flute drags in the hole and burns the wood. Store dry, not against a concrete floor.
Safety
Wood boring looks benign and is not. The hazards are specific and each has a specific defence.
Torque reaction and break-through snatch. An auger bit that binds — in a knot, on a nail, or as it breaks through — transmits the full torque of the drill to the workpiece and to your wrists. If the work is not clamped the board spins; if it is clamped the drill twists. The mitigations are mechanical, not technique: clamp or brace the work so it cannot rotate, hold the drill with two hands, one on the body and one on the auxiliary handle, and release the trigger the instant something changes pitch. Never drill a hole in a piece of timber that is being held by hand.
Nails, screws and staples in reclaimed timber. An auger bit and a nail do not negotiate. The screw point skids, the lips chip, and the bit stops dead in a way that puts the whole torque into your wrist. Non-destructive scanning has limited value here; the practical rule is to probe and inspect reclaimed timber before drilling, use a cheap sacrificial bit for the first pass if you are unsure, and never drill into a stud or joist without knowing what is already inside it — cable, pipe or fixing.
Drilling blind into a wall or floor. An auger bit will happily go through a live cable, a gas pipe or a water pipe, and the consequences range from a tripped breaker to a flood or a fire. On any renovation, find out what is behind the surface before you bore — use a cable and pipe detector, work from known socket and fixture positions, and open a small inspection hole if the route is uncertain. This is the one hazard on this page where the injury is to the building rather than the operator, and it is the most common.
- Eye protection, always. An auger bit throws chips and curls of timber at face height; this is not a job for safety squints.
- Do not wear loose gloves or sleeves near the drill. The flute will take a glove and the glove will take a finger.
- Secure long hair and loose clothing for the same reason.
- Dust: MDF, some plywoods and older finishes contain dust that should not be breathed freely. Use extraction or a suitable respirator where the material or the finish warrants it, and ventilate the space.
- Support the offcut. A large hole in a small piece leaves a section that can break away; a clamped backer board supports it and prevents both the breakout and the sudden release of the bit.
- Let the bit stop before you put the drill down. A rotating auger bit laid on a bench will walk, and it will find your hand.
Applications
Electrical and plumbing rough-in
The classic auger job. Boring studs, top plates, joists and rafters for cable and pipe, and doing it quickly because a rough-in crew may drill hundreds of holes in a day. The four-flute bit is the right choice over a spade bit here for one underrated reason: a spade bit tears the rim, and a torn rim can snag and abrade a cable jacket during the pull. A clean bored hole is smoother and the cable slides. For pipe, the hole is sized so the tube is not trapped tight, which also allows for thermal movement.
Joinery, furniture and timber framing
Dowel holes, bolt and coach-screw holes, mortise-and-tenon work, bed bolts, and peg holes in traditional timber frames. The self-feeding action is an advantage in hardwoods, where a spade bit would have to be forced and would burn, and the spurs keep the entry rim clean on visible faces.
Decking, fencing and outdoor construction
Boring for hidden fasteners, carriage bolts and threaded rod, and for the through-holes where a fixing has to pass through one member and into another. In damp or treated timber, wipe the bit down and oil it after use, because treated timber and moisture together are the fastest route to a rusted flute.
Maintenance and general works
Running services through existing structures, installing new pipework in old buildings, clearing routes for cables, and any job where a hole has to travel further than the drill can comfortably reach. This is where the extension bar earns its place.
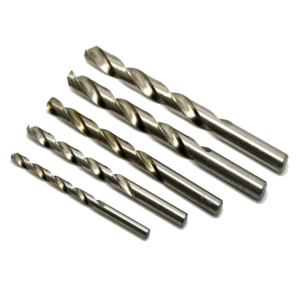
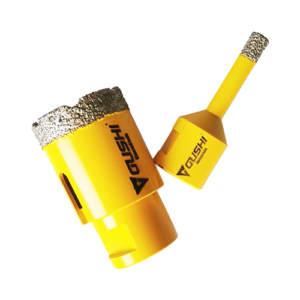
Not the right tool: this is a wood boring bit and nothing else. It cannot be used in masonry, brick, block or concrete — that is the job for the diamond core drill bit set or the vacuum brazed core drill bit set. It cannot be used in metal or in metal-stud framing — that is a job for HSS twist drill bits, and for cutting a large circle in sheet steel you want the bi-metal hole saw set. Using this set on the wrong material is the fastest way to destroy it, and it is an easy mistake to make at the end of a long day.
How to Use a Wood Auger Bit Set
- Identify what is in the timber first. On any renovation, check for cable, pipe and fixings before the bit touches the wood, and inspect reclaimed timber for nails and staples. This step prevents almost every serious injury on this page.
- Decide the hole from what goes through it. Use the diameter table above. For electrical work, size the hole to the cable and check the NEC 300.4 edge distance; for pipe, size it so the tube is not trapped.
- Mark the position, and check the structural rule. Centre the hole in the member where you can. In a load-bearing stud, keep the diameter under 40 percent of the width and the hole at least 1-1/4 inches from the nearest edge, or plan a steel protection plate.
- Clamp the work, or clamp a backer. The workpiece must not be able to move. If the exit face matters, clamp a scrap board hard against it so the break-through happens in the scrap.
- Choose the bit and check the shank engagement. Fit the bit fully into the chuck or the quick-change holder and confirm it is locked. A partially engaged hex shank is what rounds off a holder.
- Set the speed for the diameter. Small and fast, large and slow, and slower again in hardwood. Fit the extension bar only if you need the reach, and drop the speed further if you do.
- Start square, and let the screw point bite. Position the bit perpendicular to the surface, start the drill, and apply just enough pressure for the point to take hold. Once it is biting, take your hand off the pressure and let the thread feed the bit.
- Do not steer with the drill. If the hole is drifting, stop and restart rather than levering the machine sideways, which binds the shank and burns the edge.
- Clear the chips at depth. Every 25 to 30 mm, withdraw the bit fully and let the flutes empty. On long holes, do not skip this — a packed bit is much harder to extract than a cleared one.
- Control the break-through. As the point approaches the exit, ease off the trigger, and let the bit coast out into the backer board or meet the hole drilled from the other side.
- Watch the shavings, not the clock. Long shavings and light pressure mean the bit is sharp and the speed is right. Dust and heat mean it is dull or too fast, and the fix is a slower speed or a dressing, never more force.
- Wipe down and re-case. Brush the chips out of the flutes, wipe the bit with a lightly oiled rag while it is still warm, and put it back in its own slot in the case so the spurs are protected.
Frequently Asked Questions
What is a wood auger drill bit set used for?
It is the set for holes that are deep, that have to be reasonably straight, and that you want bored quickly: electrical rough-in through studs and top plates, plumbing runs through joists, bolt and dowel holes in joinery and timber frames, decking and fencing, and general deep boring in hardwood, softwood and plywood. The screw point drags the bit through the timber so you barely push, and the four flutes carry the chips out instead of letting them pack around the shank. It is not the tool for a flat-bottomed hinge recess, and it is not the tool for masonry or metal.
What does the screw point actually do?
It makes the bit self-feeding. The threaded point screws into the timber and pulls the bit forward at a rate set by the thread pitch, so you apply almost no downward force. That is the advantage, and it is also the trap: push as well and you are loading a screw that is already advancing itself, which overloads the motor and stalls the drill. The other consequence is at break-through, where the point loses the material it was biting into and the bit lurches forward. Control that by easing off the trigger as the point exits, backing the far face with a scrap board, or drilling from both sides.
Why four flutes instead of the single deep spiral on a traditional auger?
The single-spiral auger, ship auger and bell-hanger bit are built for extreme depth and long cable pulls, and their one deep continuous flute gives them enormous chip-carrying length. A four-flute boring bit trades some of that length for balance, stiffness and chip control: four lips share the load, four channels each have a short path to the surface, and the extra web keeps the bit concentric so the diameter stays accurate. In practice it starts where you aim it and leaves a cleaner wall in hardwood. The trade-off is chip clearance above roughly 200 mm, where a single deep spiral still wins.
What size hole for electrical cable, and for plumbing?
For non-metallic sheathed cable, 5/8 inch suits a single 14/2 run and 3/4 inch suits a single 12/2 run — and most electricians use 3/4 inch for 12/2 anyway, because the clearance makes the pull easier and protects the jacket. A 10/2 run wants 7/8 inch to 1 inch, and 1 inch is about the sensible maximum in a 2×4. Under NEC 300.4 the hole edge must be at least 1-1/4 inches from the nearest edge of the member, or the cable needs a steel plate at least 1/16 inch thick; the hole should not exceed 40 percent of the width in a load-bearing stud, about 1-3/8 inches in a 2×4. For plumbing, a 1/2 inch PEX or copper tube normally runs through a 7/8 inch hole.
What speed should I run an auger bit at?
Slower than a twist bit, and slower again as the diameter grows, because what matters is the speed at the rim. A workable band is roughly 500 to 1,500 rpm — 500 to 800 for the 26 to 32 mm sizes in softwood, 400 to 600 in hardwood, and up to about 1,800 for the small diameters in softwood. Reduce by about a quarter if the extension bar is fitted, and by a further third in very dense hardwoods. The signal that you are too fast is heat: a scorched smell, a polished hole wall, dust instead of shavings. Heat is what dulls a wood bit, so running cool is the cheapest way to make it last.
Will this set work in a battery drill?
Yes, but the larger diameters need real torque. As a working guide, a cordless drill wants to be around 48 V class or above for the big bits, and a corded drill about 800 W or more, or the bit will stall and stick. Hole size matters more than the drill’s label: a 32 mm bit at depth takes several times the torque of a 10 mm bit. If the machine is marginal, step the hole up in stages, run slower and clear the chips often rather than leaning on it — a stalled auger is awkward to free because the screw point is still holding.
How do I stop the exit side from blowing out?
Three methods, best first. Clamp a sacrificial board hard against the far face so the bit cuts into scrap, which is the only method that works reliably on veneered ply and melamine. Or drill from the first side until the point just breaks through, then come in from the other side to meet it, which halves the breakout because the lips are supported. Or simply ease off the trigger as the point emerges and let the bit coast, rather than holding full speed and letting the screw point yank it through. Auger bits break out hard precisely because of the lead screw: once it loses purchase it stops pulling, and the feed rate is set by how hard you are leaning.
Can I sharpen the bit, and can I sharpen the screw point?
You can sharpen the cutting lips and the spurs, and you must not touch the screw point. Dress the lips on their inside face with a fine file or a small wheel, keeping the original bevel and removing material from both lips equally or the bit will bore off-centre. Touch up the spurs on the inside edge only, so the outside diameter is not reduced. The lead screw is a precision thread that sets the feed rate; anything you do to it changes the pitch, and a damaged screw point stops self-feeding so the bit has to be pushed, which is when it burns and stalls. Replace the bit when the screw point is blunt, when the spurs will no longer take an edge, or when the lips have been dressed back to the point where the relief is gone.
MOQ, lead time, OEM and samples?
MOQ is 100 sets for standard configurations. Custom set contents, diameters, bit finish, laser marking, printed sleeves, blister cards, colour boxes and your brand on the case are made to order with an MOQ of 500 sets. Standard sets ship in 5 to 10 days and custom production in 15 to 30 days after deposit. OEM and ODM are welcome with your own brand, artwork and packaging. Samples are available at cost, with the sample fee returned against your first official order. Payment terms are T/T, L/C, D/A, D/P and PayPal, loading from Shanghai or Ningbo.
OEM & Wholesale
GUSHI has manufactured and exported tools from Huzhou, Zhejiang since 2004, and supplies wood boring and drilling accessories to tool distributors, DIY and hardware retail programmes, and branded ranges in more than 20 countries. We are one of the 23 Chinese companies that won the diamond blade anti-dumping case for the USA market, with production capacity of 100,000 sets per month.
What we can build to your specification:
- Set contents from 4 to 16 pieces, with the mix of diameters chosen for your market
- Full diameter range 6 to 38 mm, metric or imperial sizes, and intermediate diameters to order
- 1/4″ hex, 7/16″ hex, round shank or SDS variants as the market requires
- Bit finish to your specification, including black oxide, black and bright, and coated options
- Extension bars, quick-change adapters, hex keys, O-rings and retaining pins as set accessories
- Blow-moulded case, colour, insert card, sleeve, colour box and carton — plus your brand and artwork