
Product Overview
A Forstner bit set is not a substitute for a general-purpose bit set; it is the set you buy on purpose, usually because a job needs a recess rather than a through-hole. Cabinet making is the classic case: the moment you fit a concealed hinge, a drawer runner or a magnet catch, you need a pocket with a flat floor and an exact depth, and a twist bit or a spade bit cannot make one.
Three features define the tool. The rim cutting teeth lie in one plane and do the cutting, the sizing and the guiding, which is what produces a flat bottom and a true diameter. The centre point marks the position and gives the bit a pivot at the start — but it does not feed the bit forward, so unlike an auger, a Forstner relies on your hand for feed. The chip slots between the rim and the shank are the only way the swarf can leave the hole, which is why chip clearance, not horsepower, is the usual limit on how fast a Forstner cuts.
This set is supplied in the diameters that cover furniture and joinery work, headed by the 35 mm bit that fits the standard European concealed hinge cup. The cutting teeth are brazed tungsten carbide, which matters more on a Forstner than on almost any other bit: the materials most often bored with one — MDF, particleboard, plywood and laminate — are full of resin and mineral filler that is abrasive, and an HSS edge dulls against them quickly. The bodies are alloy steel with a blue powder-coat finish; the bit photographed for this page is dimensioned at 25 mm diameter and 85 mm overall length.
A note on the words. The original product description calls the job “flat bottoms and pocket holes”. A Forstner bit genuinely makes the flat-bottomed pocket — a recess. It does not make the angled pilot-and-countersink that goes with a pocket-screw jig; that is a different bit and a different operation. This page uses “pocket” strictly to mean a flat-bottomed recess.
How a Forstner Bit Cuts: Rim-Guided, Not Point-Guided
Understanding why this bit behaves the way it does comes down to one question: what does the bit use to find its position and hold its line? Every wood bit answers that question differently, and the answer decides everything about how it must be used.
Three bits, three ways of being guided
A twist bit is guided by its flutes bearing on the wall of the hole and, in a brad-point version, by a long spike. It works in thin material and in metal, and it wanders in thick timber. An auger bit is guided by a threaded lead screw that bites the timber and drags the bit forward at a rate set by the thread — which makes it fast and self-feeding, and leaves a screw point’s cone at the bottom of a blind hole. A Forstner bit is guided by its rim: the toothed circumference that cuts the wall of the hole. It has no lead screw, so it does not pull itself in; it has only a short centre point, which marks the position and then does nothing.
Two consequences follow, and they are the whole character of the tool:
- The bottom is flat. Nothing protrudes through the plane of the cutting teeth, so a blind hole finishes with a flat floor plus a shallow centre dimple. That is what makes the bit usable for a hinge cup, an inlay or a T-nut seat.
- You feed it, not the bit. With the self-feeding removed, the feed rate is entirely under your hand. That is a benefit — you can creep up on a 12.5 mm depth stop — and a responsibility, because pushing instead of cutting is how a Forstner overheats.
Why the rim being the guide also means the rim must be square
A rim-guided cutter has a hard requirement: it only cuts a true circle if it enters on its own axis. Tilt the bit and the rim touches on one side first, cutting a crescent, and the hole comes out oval, undersized on one side and too large on the other. The hardware then rocks in a hole that is not round. This is why the same operation that is trivially easy on a drill press — boring a 35 mm cup — is genuinely hard with a hand drill, and why the professional answer is a drilling jig or guide block rather than a steadier hand.
The centre point: small, and not a decoration
The point does two jobs. It gives you something to place on your awl mark so the bit does not walk across a finished face before it bites, and it holds the bit on that mark for the first few degrees while the rim establishes the wall. It does not hold the bit square — that is your setup — and it does not pull the bit down. A flat or damaged point is the usual reason a Forstner starts off-centre, and it is not worth tolerating: on hardware work an off-centre cup cannot be adjusted back.
What the Missing Lead Screw Buys You
Remove the screw point from a bit and, paradoxically, you gain freedom. Because the Forstner does not need a lead screw to be holding material in order to advance, it can cut in situations where a self-feeding bit would lose its feed and lurch — and because its rim is a complete circle that cuts all the way round, it can cut a shape that is not entirely surrounded by wood.
1. A flat-bottomed hole to an exact depth
The core capability, and the reason the bit exists. Bore to the depth stop, withdraw, and the pocket is flat. For a hinge cup that means the cup sits flush; for a T-nut or threaded insert it means the hardware seats on a flat floor instead of wobbling on a cone.
2. Overlapping holes — a pocket made from a row of bores
Bore a series of overlapping circles and you have removed the bulk of a slot or a mortise with clean walls, ready to square the ends with a chisel. This is the standard way to rough out a mortise for a lock body, a hinge leaf or a fastener plate without a mortiser. The rim of each hole cuts a full clean arc, so the sides are far tidier than what a spade bit would leave. Use a bit slightly narrower than the mortise is wide, and step across in fractions of a diameter.
3. A half hole on the edge of a board
Clamp a scrap behind the work so the rim has something to cut into, position the bit so half of it hangs over the edge, and bore: you get a clean half-circle in the edge of the board. That is how an edge bore is made for a dowel at the edge of a panel, or a recess on the edge of a rail. A spade or twist bit will walk off the edge; a rim-guided bit cannot, because the part of the rim that is in the wood establishes the cut.
4. An angled hole
Because the rim cuts all the way round regardless of how it meets the surface, an angled hole comes out round rather than torn — splayed dowels in a chair leg, for example, or a recess in a sloping surface. The rule is only that the bit must enter along its own axis: it will cut an angled hole relative to the workpiece, but it will not be steered to that angle for you. Mark the angle, present the bit square to the axis you want, and hold it there.
5. A pocket for hardware, in one pass
Because the diameter is fixed by the rim, a Forstner bores a pocket that matches the hardware exactly — cup, magnet, insert, flush-mount plate or badge. For a run of identical doors, that repeatability is worth more than the cutting speed, and it is the reason a hinge-cup jig plus a 35 mm Forstner is faster in practice than any freehand method.
The honest limit: none of this makes the Forstner a fast bit. It removes material at the bottom of a hole, not along a deep channel, and it is the slowest of the wood bits in deep timber. For deep structural holes you want an auger bit set; for a quick rough through-hole a flat (spade) bit set is faster. The Forstner is the bit you choose when the finish matters more than the clock.
Rim Types in the Forstner Family
“Forstner” describes a geometry — rim-guided, flat-bottomed — not a single cutting edge. Within the family the rim is made in three forms, and the form changes the finish, the chip clearance and the diameter the bit is sensible in. Knowing which you are holding explains most of the difference in how two Forstner bits of the same size behave.
| Rim form | Sawtooth rim | Continuous rim | Staggered / multi-tooth |
|---|---|---|---|
| What it is | Fine teeth cut around the full circumference | A solid forged cutting lip, usually with two cutters and two spurs | Two or three cutters set at different heights around the rim |
| Entry quality | Cleanest; least tear-out on a visible face | Good; can tear on veneer and cross-grain | Good; the offset teeth shear rather than scrape |
| End grain | Best; the small teeth slice end grain cleanly | Poor; tends to tear end grain | Fair to good |
| Chip clearance | Good; many small teeth make many small chips | Weak; large chips, packs quickly at depth | Good; the offset cutters break the chip |
| Grab / kickback risk | Low; small bites | Higher; one large bite per revolution | Lowest at large diameters; load is shared |
| Typical use | Furniture, inlay, veneer, end grain, visible work | Softwood, rough recesses, fast removal | Large diameters, 35 mm and up, hinge cups |
| Diameter sweet spot | 10–35 mm | 10–30 mm | 26–100 mm |
| Sharpening | Diamond file on each small tooth; slow but straightforward | Single lip, easiest to hone | Hone each cutter on its top face, equal strokes |
There is a second, independent choice: the cutter material. A Forstner edge is either high-speed steel or a brazed tungsten carbide tip. On clean softwood and hardwood the two behave similarly, but on MDF, particleboard, plywood and laminate — the boards furniture is actually made of — carbide holds its edge far longer, because those materials carry resin and mineral filler that is abrasive. The bits shown here are carbide tipped. For the full material comparison, see the single-bit page, Wood Forstner Drill Bits.
Which Diameter for Which Job
In a Forstner set the diameter is not a clearance choice, it is a fit choice: the hole has to match the hardware or the dowel. These are the jobs that account for most Forstner use, and the sizes that go with them.
| 15–16 mm | Small dowel recesses, magnet and small hardware pockets, decorative inlay dots, cable routing inside a cabinet panel |
|---|---|
| 18–20 mm | Dowel and loose-tenon holes, small cup hinges on light doors, insert seats, lacing and cleat recesses |
| 22–25 mm | Standard dowel joinery, larger loose tenons, hobby and mini hinge cups, shallow recesses for flush plates |
| 28–30 mm | Medium hardware pockets, larger inlay, seats for threaded inserts and stud fixings |
| 35 mm | The European concealed hinge cup — the single most important size in the set, bored 12.5–13 mm deep |
| 38–40 mm | Large hinge cups, cable grommets, deep hardware pockets, plinth and lighting recesses |
| 45–50 mm | Large recesses and inlays, big grommets, decorative features, bulk waste removal before squaring |
Two rules of thumb make the choice reliable. First, match the hardware, not the nearest round number: a cup hinge needs 35 mm because the cup is 35 mm, and a dowel needs the dowel’s own diameter so the joint closes. Second, bore the smallest diameter that will do the job: a smaller bit removes less material, generates less heat, is easier to keep square and puts far less torque through your wrist. Where the hardware allows, pick the small bit and take two passes rather than one big one.
Full Specifications
| Product type | Forstner / pattern-maker’s boring bit set, rim-guided, flat-bottomed, with brazed tungsten carbide cutters |
|---|---|
| Set contents (options) | 5-piece (15, 20, 25, 30, 35 mm), 8-piece and 12-piece configurations; contents confirmed to order |
| Diameter range | 15, 16, 18, 19, 20, 22, 25, 26, 28, 30, 32, 35, 38, 40, 45, 50 mm; full range 10–100 mm on request |
| Imperial sizes | 1/4″–2″ equivalents to order, including the imperial hardware sizes |
| Overall length | 85 mm standard for the 25 mm bit as photographed; 90 mm for most of the range — confirm per size |
| Shank | Round shank, 6 mm (small), 8 mm (medium), 10 mm (large); three-face (triangular) and reduced shank options on request |
| Cutting geometry | Rim-guided teeth in a single cutting plane, short centre point, chip slots between rim and body |
| Rim form | Sawtooth, continuous or staggered / multi-tooth depending on diameter |
| Cutter | Brazed tungsten carbide teeth, red-tipped; HSS version available to order |
| Body material | Alloy steel, hardened and tempered |
| Finish | Blue powder-coat body with a bright shank (colour to your specification on OEM orders) |
| Recommended speed | Approx. 250–2,500 rpm depending on diameter and material; slower as the diameter grows |
| Recommended machine | Drill press preferred. Hand drill acceptable up to about 19 mm with a guide block |
| Hole type | Blind, flat-bottomed, exact-depth pockets; also overlapping, edge and angled holes |
| Materials bored | Softwood, hardwood, plywood, MDF, particleboard, chipboard, laminate, melamine, veneer, plasterboard, plastics |
| Not for | Masonry, brick, block, concrete, metal, or timber that may contain nails and staples |
| Packaging | Storage case, roll or blister card; printed sleeve, colour box and carton to order |
| MOQ | 100 sets standard; 500 sets for custom set contents, cutter grade, finish, marking or packaging |
| Lead time | 5–10 days standard; 15–30 days for custom production after deposit |
| Payment terms | T/T, L/C, D/A, D/P, PayPal |
| Loading port | Shanghai or Ningbo |
| OEM / ODM | Welcome — your brand, artwork, case colour and packaging |
Prices run roughly US$5–40 per set depending on set size, diameters, cutter material and packaging. Tell us the board materials you bore and the hardware you fit and we will quote the set that matches, rather than the one that happens to be nearest.
Making a Flat-Bottomed Recess: Methods Compared
A flat-bottomed recess is a specific deliverable, and several tools will claim it. They are not interchangeable, and the differences show up the moment the recess has to match hardware or sit on a visible face. This table compares them on the qualities that decide the choice.
| Method | Forstner bit (this set) | Plunge router + straight bit | Spade (flat) bit | Brad-point bit | Chisel and mallet |
|---|---|---|---|---|---|
| Flat bottom | Yes, across the full diameter | Yes; the flattest of all | No — a cone from the point | No — a cone from the point | Yes, with care |
| Round hole, true size | Yes, set by the rim | Yes, if guided by a template | Oval-ish; tears the rim | Yes, in small sizes | No — square or shaped |
| Exact depth control | Easy with a depth stop | Easy with a depth stop | Poor; no stop on most bits | Poor | By eye and by marking gauge |
| Arbitrary shapes | Circles; overlapping circles make slots | Any shape, with a template | Circles only | Small circles only | Any shape |
| Edge and half holes | Yes, with a scrap behind | Yes, with support | Walks off the edge | Walks off the edge | Yes, but slow |
| Equipment needed | Drill press or guided hand drill | Router, template, bushings | Any drill | Any drill | Skill and time |
| Speed on one recess | Fast — one setup, one plunge | Slow — template has to be made | Fast but rough | Fast in small sizes | Slowest |
| Best for | Hardware cups, dowels, inserts, inlay, mortise waste | Large irregular recesses, repeated production runs | Rough clearance where nobody will see it | Small precise recesses and pilot holes | Squaring a mortise, fitting a hinge leaf by hand |
The working rule: for a round recess with a flat floor — which is most hardware — the Forstner is the fastest thing that will do the job properly. Reach for the router when the recess is not round or when you are making hundreds of identical ones; the template pays for itself over a run. Never reach for a spade or brad-point bit when the bottom is going to be seen or the hardware is going to sit on it, because the point leaves a cone and the hardware will not seat.
The 35 mm Hinge Cup and Furniture Hardware
The 35 mm bit is the reason most people buy a Forstner set, and the operation is unforgiving enough to deserve its own numbers. Get it right and the door hangs and adjusts; get it wrong and the door is scrap, because an off-centre or over-deep cup cannot be corrected.
The standard dimensions
| Cup diameter | 35 mm for the standard European concealed hinge (26 mm and 40 mm cups exist for other systems) |
|---|---|
| Cup depth | About 12.5–13 mm; a few systems want 11.5–12 mm, so check the hinge maker’s own figure |
| Hole centre from the door edge | About 22–22.5 mm. The cup radius is 17.5 mm, plus a shoulder of 4–5 mm of wood left between the hole and the edge |
| Door thickness | Typically 16–22 mm. A 12.5 mm bore in a 16 mm door leaves just 3.5 mm of face material |
| Depth stop | Essential. Use the drill press stop, or a stop collar, or a tape wrap if you must work by hand |
| Centre mark | Awl or scratch awl, not a pencil — a dimple stops the point walking on a slick laminate face |
| Test fit | The cup should drop in and sit flush with no rocking. Shim with a thin disc of veneer or card if the bore went slightly deep |
The two errors that ruin doors
Too deep. Break through the front face and the door is finished. This is the reason a 12.5 mm bore in a 16 mm door is a close call and a depth stop is not negotiable. If you have gone a fraction deep, cut a thin disc of veneer or card to fit the bottom of the cup; glue it in and the hinge sits flush again. If you have gone through, the door has to be replaced or re-faced.
Off centre. The centre point marks the position, but the bit still has to enter square. Tilt it and the cup recess comes out oval, and an oval cup means a hinge that rocks and a door that will not adjust true. Mark with an awl, clamp the door, and use a jig or a guide block rather than relying on a steady hand. A repeatable jig is also faster over a run of doors, because the setup cost is paid once.
Beyond the cup: the other hardware jobs
The same logic covers the rest of the cabinet’s ironmongery. Magnet catches and flush-mount plates want a shallow pocket at an exact depth so the plate sits flush with the surface. T-nuts and threaded inserts need a flat seat, because on a conical bottom they tilt and the fixing cannot pull square. Drawer runners, shelf pins and bench dogs all want a bore of a specific diameter with a clean edge. And in joinery, dowel and loose-tenon holes want a flat bottom so the dowel seats against the base and the joint closes hard, instead of bottoming out on a screw point’s cone and leaving a gap.
Drill Press or Hand Drill?
This is the decision that determines whether a Forstner job goes well, and the honest answer is that the tool wants a drill press and will tolerate a hand drill only within limits.
Why the bit wants a drill press
The rim is the guide, so the bit’s accuracy is almost entirely a function of how squarely it enters and how well it is held on axis while it cuts. A drill press gives a fixed 90-degree axis, a table that holds the work, and a depth stop you can repeat exactly — the three things a Forstner needs. On cabinet work that is decisive: identical cups on a run of doors come from a fixed setup, not from a steady arm.
What a hand drill can and cannot do
General practice in the trade is that Forstner bits up to about 19 mm (3/4 inch) can be used in a hand drill with care, and larger ones should not be. The reason is not only accuracy. A large Forstner takes a deep bite, and if it hangs on a knot, a glue line or a change of grain, it will spin the drill — or spin the workpiece if the workpiece is lighter than the drill. A 35 mm cup bit in a hand drill is a real hazard, and the professional answer is not a firmer grip but a drilling jig or guide block. With a guide to hold the axis and clamps to hold the door, hand boring a hinge cup is repeatable. Without them it is luck.
The setup that works
- Clamp the work. Never hold a piece being bored with a Forstner by hand — if it catches, the piece becomes a projectile. Add a sacrificial backer underneath for through-holes and for edge work.
- Mark with an awl. A dimple locates the point and stops it skating across a laminate or a finished face.
- Set the depth stop, and check it against a scrap. Bore a test hole in an offcut of the same thickness before you touch the real door.
- Prepare for the breakthrough. On a through-hole, ease off as the point exits and let the bit coast into the backer rather than driving it through.
- Two hands and the auxiliary handle on any diameter where the bit could grab, so the torque has somewhere to go.
Speed, Feed and the Peck Cycle
Speed: governed by the rim, not the spindle
The number that matters is the speed at which the rim travels, and the rim is further from the centre on a big bit, so it travels faster at the same rpm. That is why every Forstner speed chart in existence says the same thing in different numbers: small bits fast, big bits slow. Makers publish figures that differ quite widely — some are conservative hobbyist numbers, some are production numbers — so use the table as a starting band and let the shavings tell you where to land inside it.
| 10–15 mm | About 1,500–2,500 rpm in softwood; 700–1,200 rpm in hardwood and MDF |
|---|---|
| 16–25 mm | About 800–1,800 rpm in softwood; 500–900 rpm in hardwood and MDF |
| 26–35 mm | About 400–1,000 rpm in softwood; 300–600 rpm in hardwood and MDF |
| 38–50 mm | About 250–600 rpm in softwood; 200–400 rpm in hardwood and MDF |
| 35 mm hinge cup | A sane start is roughly 500–1,000 rpm; slower in hardwood doors and in MDF |
| Very dense hardwoods | Drop to the bottom of the band, or a little below, and feed very lightly |
The invariant that survives every chart is simple: double the diameter and you should halve the rpm, because that keeps the rim speed roughly constant. If you cannot remember a single figure, remember that one.
Feed: light, steady, and never as a substitute for sharpness
A Forstner wants a light, even feed and no more. Two things go wrong when you push. The bit cannot clear its chips faster than it makes them, so the rim begins to rub rather than cut; and the friction converts to heat, which softens the edge and burnishes the wall. Because there is no self-feeding screw to limit the rate, the temptation to lean on the drill is stronger with a Forstner than with any other bit — and it is always the wrong answer. If the bit needs force to cut, it is dull, too fast, or full of chips; adding pressure only makes all three worse.
The peck cycle: the single habit that saves Forstner bits
A Forstner cuts a full circle, and its chips have only the slots between the rim and the body to escape through. At even shallow depths they accumulate, and once the rim is sitting on a bed of its own swarf it stops cutting and starts rubbing. The fix is to bore a short distance, withdraw the bit completely, let the slots empty, then go back in — about every 5 to 10 mm, and more often in resinous softwood or MDF, where the dust is fine and packs tightly. Two further points follow from the same physics:
- Clear the hole between passes when mortising. If you are boring a row of overlapping holes, empty each hole before starting the next, so the new cut is not made into a pile of debris.
- Never poke chips out with the cutting edge. Carbide is brittle; levering swarf out of the slot with the rim chips the teeth. Use a brush or a blast of air.
Materials, Janka and Abrasive Boards
A Forstner bit meets a wider range of “wood” than a framing bit does, and the range matters, because hardness changes the feed and abrasiveness changes the edge life.
Hardness: the Janka number tells you what to expect
The Janka scale measures the force needed to embed a steel ball in the wood, in lbf. It maps well onto how a Forstner behaves, because a harder wood both resists the cut and holds the heat. Some anchors: balsa around 100, pine and other softwoods roughly 380–600, poplar about 540, cherry about 950, walnut about 1,010, oak about 1,360, hard maple about 1,450, hickory about 1,820, and something like ipe above 3,000.
| Softwoods (Janka up to about 700) | Run near the top of the speed band, feed steadily, and expect the bit to cut freely. Resinous species pack the slots, so peck often. |
|---|---|
| Medium hardwoods (700–1,200) | Drop to the middle of the band. Cherry, walnut and similar bore cleanly with a sharp bit and a light feed. |
| Hard hardwoods (1,200 and above) | Drop the speed by roughly a third from the softwood figure, feed very lightly, and peck more often. Oak, maple and hickory will burn quickly if hurried. |
| Very dense exotics (2,000+) | Treat as a slow, light operation; expect the edge to dull faster, and stop the moment the shavings go dusty rather than crisp. |
Abrasiveness: why furniture boards are the real test
The materials a cabinetmaker bores most often are not solid timber at all. MDF, particleboard and chipboard are wood fibre or chips bonded with resin, and many boards carry mineral fillers and hard glues; plywood has glue lines running through it; laminate and melamine have a hard, brittle surface layer. All of it is abrasive out of proportion to its softness. An HSS edge dulls quickly against these boards even though they cut easily, and a dull Forstner burnishes a laminate face rather than slicing it. That is the practical argument for a carbide-tipped bit, and it is why the bits shown here are brazed TC.
Two related cautions. End grain is much harder to bore cleanly than side grain, and it is where a sawtooth rim earns its keep; the tool makers’ guidance for Forstner bits is generally side-grain boring, with sawtooth cutters recommended for end grain. And reclaimed or painted timber may hide nails, staples and old fixings that will chip a rim in one revolution — probe and inspect before the bit goes in.
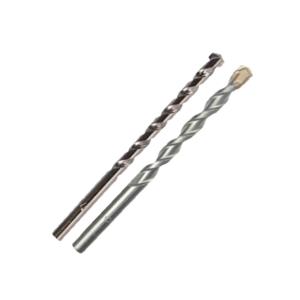
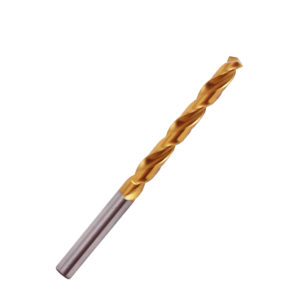
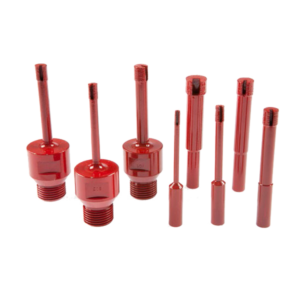
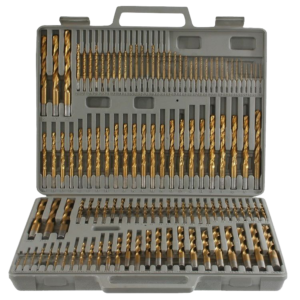
Not for: this is a woodworking bit. It is not for masonry, brick, block or concrete — that is the HSS twist drill bit set‘s world in metal and the diamond core bits for stone; and it is not for metal or metal studs. Running this set on the wrong material is the fastest way to destroy it.
Sharpening a Carbide-Tipped Forstner Bit
A Forstner has three working surfaces — the rim teeth, the outside diameter, and the centre point — and only one of them is meant to be touched. Getting that right is the difference between a bit that lasts for years of cabinet work and one that is thrown away at the first dull edge.
What to sharpen and what to leave alone
| Rim teeth (the cutting edge) | Sharpen. Hone the flat top face of each tooth with a diamond file or a fine diamond paddle, keeping the original angle and taking the same number of strokes on every tooth so the rim stays concentric. |
|---|---|
| Outside diameter | Do not touch. The outside of the rim is the hole size; any material removed there makes the recess undersize and the hardware will not fit. |
| Centre point | Do not reshape. A blunt or shortened point makes the bit walk and start off-centre, and on hardware work that is unrecoverable. |
| Chip slots | Clear, do not file. Brush or blow the swarf out. Never lever it out with the cutting edge, because carbide is brittle. |
Use a diamond, never a bench grinder
On a brazed carbide tip the rule is absolute: hone with diamond, by hand. A bench grinder puts enough heat into the tooth to micro-crack the carbide and to soften the braze that holds it to the steel — and a tip that has been overheated will come off in service rather than cutting. Carbide is also brittle in a way steel is not, so treat the head as glass: do not drop the bit on a concrete floor, do not use it as a lever, and do not bang it out of the chuck.
How a Forstner retires
| Rim teeth dull | Needs pressure, runs hot, makes dust instead of shavings, hole wall burnished. Hone the top faces; if the tooth is worn back past its relief, replace. |
|---|---|
| Tooth chipped or cracked | Ragged hole edge, and it will not cut a true circle. Carbide cannot be rebuilt at the bench — replace the bit. |
| Centre point flat | The bit walks off the mark and cups come out off-centre. Replace; there is no field repair that restores the point. |
| Body blue or discoloured | Overheated in service; the tooth braze is suspect and the temper is gone. Replace. |
| Bent shank | Visible run-out and an oval, oversized hole. Caused by levering the drill or a drop. Replace. |
Storage
Keep the set in its case with each bit in its own slot. Carbide teeth chip against anything hard, and a handful of loose Forstner bits in a toolbox will chip each other’s rims within a week — and a chipped rim is a scrapped bit. Keep the bits dry; a light wipe of oil on the shank and body after use stops rust in a damp workshop, because a rusted shank drags in the chuck and a rusted body drags in the hole.
Safety
Boring a recess looks like the gentlest job in the workshop. It is also the one where a bit hangs, the torque has nowhere to go, and either the work or the drill starts to spin. The hazards are specific, and so are the defences.
Large bits in a hand drill. A Forstner above about 19 mm in a hand drill can hang on a knot, a glue line or a change of grain, and when it does the whole drill turns. The working rule in the trade is that bits larger than 19 mm (3/4 inch) should be used in a drill press or with a guide, and that a large bit in a hand drill can injure the operator when it catches. A 35 mm cup bit in a hand drill is the specific case to avoid unless the bit is guided and the door is clamped.
Unclamped work and the spinning workpiece. If the work is lighter than the drill and the bit grabs, the work spins instead — and a spinning cabinet door or panel is far more dangerous than a stalled drill. Clamp the workpiece to the table or the bench every time, and support it with a backer board so a large recess does not release a section of material suddenly.
Break-through on a finished face. A through-hole bored with a Forstner will blow out the exit face if there is nothing behind it, and on laminate, veneer or melamine the blow-out is not repairable. Clamp a sacrificial board hard against the far face, ease off as the point exits, or bore from both sides. A depth stop protects the front face of a hinge cup; a backer protects the back.
- Eye protection, always. A Forstner throws fine, hot dust and small chips at face height.
- No loose gloves, sleeves or jewellery near the drill. A rotating shank or rim will take a glove and the glove will take a finger.
- Tie back long hair for the same reason.
- Dust extraction and a respirator. MDF and particleboard dust is fine and persistent and many boards carry formaldehyde-based binders; a Forstner makes a lot of it. Extract at source, and wear a suitable mask in an enclosed space.
- Two hands and the auxiliary handle on any diameter large enough to grab, so the reaction torque has somewhere controlled to go.
- Let the bit stop before you put the drill down. A rotating Forstner laid on a bench will walk, and it will find your hand.
- Check the timber first. Nails, staples and old fixings chip a carbide rim in a single revolution and put the torque into your wrist. Probe and inspect reclaimed or painted stock.
Applications
Cabinet making and furniture hardware
The core application. The 35 mm cup recess for European concealed hinges, magnet catches, flush-mount plates, drawer-runner and shelf-pin bores, and seats for T-nuts and threaded inserts. The requirement in every case is a flat floor and an exact diameter, which is exactly what a rim-guided bit delivers.
Dowel and loose-tenon joinery
Dowel holes, loose-tenon mortises and bed-bolt recesses. A flat bottom is not cosmetic here: a dowel that bottoms out on a screw point’s cone holds the joint open by the depth of the cone. With a flat-bottomed hole the dowel seats on the base, the shoulders of the joint close hard, and the glue line is the only gap left.
Mortising, before the chisel
Overlapping Forstner holes remove the bulk of a mortise quickly and with clean sides, leaving only the corners to be squared with a chisel. This is the standard bench method for a lock-body mortise, a hinge leaf or a fastener plate, and it is far tidier than what a spade bit leaves.
Inlay, veneer and decorative work
Recesses for inlay, veneer patches, marquetry inserts and decorative dots. The exact-depth flat bottom is what makes a patch sit flush, and the sawtooth rim is what keeps the entry edge clean on a visible face.
Edge, overlap and angled holes
Half holes on the edge of a panel, elongated pockets made from a row of overlapping bores, and angled holes such as the splayed dowels in a chair leg. These are the jobs that no other wood bit can do at all, and they are the clearest argument for keeping a Forstner set alongside the augers and spades.
Jigs, fixtures and workshop furniture
Flat-bottomed seats for bench dogs, holdfast collars, threaded inserts and T-nuts, and repeatable recesses in shop-made jigs and templates. A rim-guided bit marks its own diameter and depth every time, which is what a jig needs.
Not the right tool: this set bores wood and wood-based boards and nothing else. It cannot be used in masonry, brick, block or concrete — for those, see the HSS twist drill bit set for metal or the diamond core drills for stone. For deep structural holes in framing, use the wood auger bit set; for a fast rough through-hole, a flat (spade) bit; for a large circle for a pipe or a lock, a hole saw. For countersinking a screw head, the dedicated wood countersink drill bits are the correct tool rather than a Forstner.
How to Bore a Flat-Bottom Hole
- Confirm the job wants a Forstner. If the hole has to finish flat, or has to match a piece of hardware, or has to run off the edge of a board, this is the right bit. If it is a deep structural hole, switch to the auger set before you start.
- Choose the diameter from the hardware, not the drill index. 35 mm for a standard European hinge cup; the dowel’s own diameter for a dowel joint; the insert’s own diameter for a threaded insert.
- Inspect the material. Check reclaimed and painted stock for nails, staples and old fixings, and confirm what board you are boring — MDF and laminate need a slower speed and a sharper edge than pine.
- Mark the centre with an awl. A dimple locates the point and stops it skating across a laminate or a finished face. Pencil is not enough on a smooth board.
- Clamp the work, and add a backer. Clamp the workpiece so it cannot move, and clamp a sacrificial board hard against the exit face if the hole is going through or if you are boring an edge hole.
- Fit the bit properly. Seat the shank fully in the chuck or the quick-change holder and confirm it is locked. A partially engaged shank is what rounds off a holder.
- Set the depth stop, and prove it on a scrap. Bore a test hole in an offcut of the same thickness and measure it. On a 12.5 mm cup in a 16 mm door there is no room for error, so this step is the one that saves the door.
- Set the speed for the diameter. Small and fast, large and slow — roughly 500 to 1,000 rpm for a 35 mm cup, less in hardwood and MDF.
- Enter square, and let the rim cut. Present the bit perpendicular to the surface, start the drill, and lower it lightly until the rim is fully engaged. The rim is the guide, so the entry angle is everything.
- Peck to clear the rim. Every 5 to 10 mm, withdraw the bit completely and let the chip slots empty. In MDF and resinous softwood, do it more often.
- Do not steer with the drill. If the hole is drifting, stop and restart rather than levering the drill sideways, which binds the shank and burns the edge.
- Stop at the stop and withdraw. Let the bit come to rest at the depth you set, withdraw at running speed, and do not re-enter to tidy up — a second pass into a clean hole only adds heat.
- Test-fit, then maintain. Drop the hardware in and check for rocking; shim a slightly deep cup with a thin disc of veneer or card. Brush the chips out of the slots, wipe the body, and put the bit back in its own slot in the case so the carbide rim is protected.
Frequently Asked Questions
What is a Forstner drill bit set used for?
Holes that have to finish flat, or that cannot be made any other way: the 35 mm cup recess for a European concealed hinge, dowel and loose-tenon holes, mortise waste removal before squaring with a chisel, exact-depth recesses for inlay and veneer work, seats for T-nuts and threaded inserts, and edge, overlapping or angled holes. Because the bit is guided by its rim rather than a lead screw, it can bore half a hole on the edge of a board and a row of overlapping holes to make an elongated pocket. It is not the tool for deep structural holes — that is the auger bit — and it is not the tool for masonry or metal.
Why does a Forstner bit make a flat-bottomed hole when other bits do not?
Because nothing on the bit protrudes through the cutting plane. An auger has a threaded lead screw in front of its lips and a brad-point bit has a long spike, so both leave a cone at the bottom of a blind hole. On a Forstner the rim teeth all lie in one plane and the centre point only marks the position, so stopping at a set depth leaves a flat floor across the full diameter. That is exactly why it is the bit for hinge cups and inlay: the hardware or the insert seats on a flat base instead of rocking on a cone. The only mark is a shallow centre dimple, which is harmless under hardware.
Can I drill overlapping holes and half holes on the edge of a board?
Yes, and this is the capability no other wood bit has. Because the bit is guided by its rim and not by a central screw or pilot hole, you can bore overlapping holes to clear an elongated pocket or mortise, and you can bore a clean half-circle on the edge of a board by clamping a scrap hard behind the work so the rim has material to cut into. You can also bore an angled hole, such as a splayed dowel for a chair leg, because the rim cuts all the way round. The only requirement is that the bit enters along its own axis: it will cut an angled hole relative to the surface, but it will not be steered to that angle for you.
Can I use a Forstner bit in a hand drill, or do I need a drill press?
A drill press is the natural home, because the rim is the guide and any tilt cuts a crescent on one side, giving an oval or undersized hole and a cup that rocks. For small diameters and rough work a hand drill is fine: general practice is that bits up to about 19 mm (3/4 inch) can be used by hand with careful square entry, and larger ones should not be. The reason is safety as much as accuracy — a large Forstner can hang on a knot or a glue line and spin the drill, or the work. If you must bore a 35 mm hinge cup by hand, use a drilling jig or a guide block, clamp the door, and set the depth with a stop collar or a tape wrap.
What size and depth is a 35 mm hinge cup, and where do I position it?
The standard European concealed hinge uses a 35 mm cup, bored about 12.5 to 13 mm deep — check the hinge maker’s own figure, as it varies slightly. Position the centre about 22 to 22.5 mm from the door edge: the cup radius is 17.5 mm and you want a shoulder of roughly 4 to 5 mm of wood between the hole and the edge. Doors are usually 16 to 22 mm thick, so a 12.5 mm bore in a 16 mm door leaves only 3.5 mm of face, which makes a depth stop essential — breaking through the front face ruins the door. Mark the centre with an awl first so the point does not walk, and test-fit: the cup should sit flush with no rocking. If you bore slightly deep, a thin disc of veneer or card in the bottom of the cup takes up the difference.
What speed should I run a Forstner bit at?
Slower than a twist bit, and slower again as the diameter grows, because what matters is the speed at the rim and the rim travels further on a big bit at the same rpm. Makers publish different figures, so treat these as a working band and let the shavings govern: 10 to 15 mm about 1,500 to 2,500 rpm in softwood and 700 to 1,200 in hardwood; 16 to 25 mm about 800 to 1,800 softwood and 500 to 900 hardwood; 26 to 35 mm about 400 to 1,000 softwood and 300 to 600 hardwood; 38 to 50 mm about 250 to 600 softwood and 200 to 400 hardwood. For a 35 mm hinge cup, roughly 500 to 1,000 rpm is a sane start. The invariant across every table is that doubling the diameter means halving the rpm.
Why does my Forstner bit burn and make dust instead of shavings?
Almost always heat, from one of three causes — and the fix is never more pressure. First, speed: too many rpm at the rim burnishes the wall and burns the timber. Second, chips: a Forstner cuts a full circle, so swarf has to escape through the slots between rim and body, and at depth it packs and the rim rubs instead of cutting — clear it with a peck cycle, withdrawing fully every 5 to 10 mm. Third, a dull edge: once the teeth are blunt the bit polishes rather than slices and needs honing, not more speed or feed. A cool, sharp Forstner makes crisp shavings and a clean wall; dark dust and a polished hole mean stop and change one of the three.
How do I sharpen a carbide-tipped Forstner bit?
With a diamond, and gently. Hone the flat top face of each tooth with a diamond file or a fine diamond paddle, keeping the original angle, and take the same number of strokes on every tooth so the rim stays concentric. Do not use a bench grinder on a brazed carbide tip — the heat will crack the carbide and can soften the braze that holds it on. Do not touch the outside diameter of the rim, because that dimension is the hole size, and do not reshape the centre point, because a blunt point makes the bit walk. Carbide is brittle, so never lever chips out of the slots with the cutting edge and never let the bit drop onto a concrete floor. Replace it when a tooth is chipped or cracked, when the centre point is flat, or when the body has gone blue from overheating.
MOQ, lead time, OEM and samples?
MOQ is 100 sets for standard configurations. Custom set contents, diameters, cutter grade, finish, laser marking, printed sleeves, blister cards, colour boxes and your brand on the case are made to order with an MOQ of 500 sets. Standard sets ship in 5 to 10 days and custom production in 15 to 30 days after deposit. OEM and ODM are welcome with your own brand, artwork and packaging. Samples are available at cost, with the sample fee returned against your first official order. Payment terms are T/T, L/C, D/A, D/P and PayPal, loading from Shanghai or Ningbo.
OEM & Wholesale
GUSHI has manufactured and exported tools from Huzhou, Zhejiang since 2004, and supplies wood boring and drilling accessories to tool distributors, DIY and hardware retail programmes, and branded ranges in more than 20 countries. We are one of the 23 Chinese companies that won the diamond blade anti-dumping case for the USA market, with production capacity of 100,000 sets per month.
What we can build to your specification:
- Set contents from 3 to 16 pieces, with the mix of diameters chosen for your market
- Metric and imperial sizes, including the 35 mm cup bit and the intermediate diameters your market asks for
- Carbide-tipped or HSS cutters, sawtooth, continuous or staggered rim forms
- Round, three-face, hex and reduced shanks, and shank lengths to suit your machines
- Body colour, powder-coat finish and laser marking to your specification
- Storage case, roll, blister card, printed sleeve, colour box and carton — plus your brand and artwork