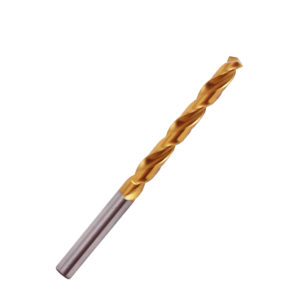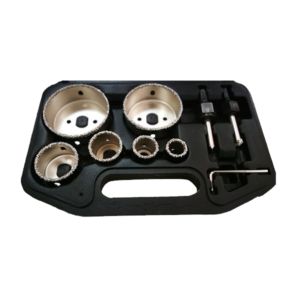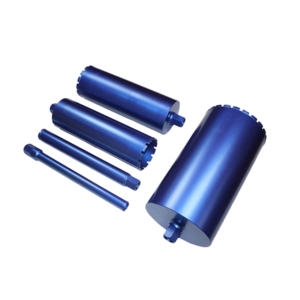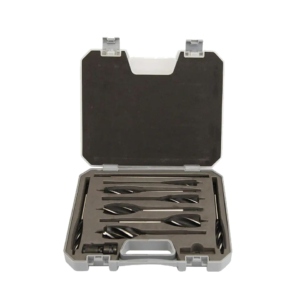
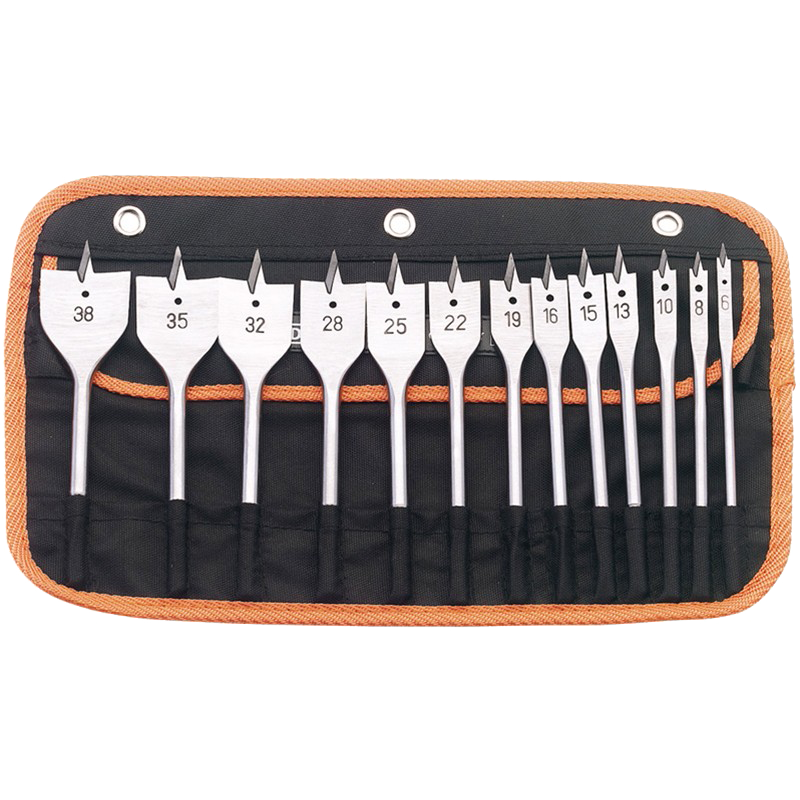
Specification
| Product | Wood flat drill bits set (also sold as spade bit set, paddle bit set) |
|---|---|
| Body material | Carbon steel, hardened; titanium-coated finish for reduced friction and corrosion resistance. See our Ti-coated drill bit set page for what a coating does and does not change — it extends edge life, it does not make the bit sharper or stronger. |
| Cutting geometry | Centre point (brad / spur tip), two cutting lips, two outer spurs, chip-clearance groove |
| Shank | 1/4″ (6.35 mm) hex, quick-change, fits impact drivers and hex bit holders |
| Diameter range | 6–38 mm (1/4″ to 1-1/2″) |
| Set configurations | 6 pc, 8 pc, 13 pc; custom size ranges on request |
| Standard lengths | 150 mm (6″) standard; 300 mm (12″) long-reach available |
| Paddle thickness | Approximately 3–6 mm (1/8″ to 1/4″), ground — thin enough to be cheap and easy to re-file |
| Typical bore tolerance | ±0.5 to 1.0 mm (Forstner equivalent: ±0.1 to 0.2 mm) |
| Hole bottom | Pointed / cupped — not flat |
| Practical depth | About 3× diameter before chip packing dominates; see the clearance table below |
| Primary applications | Cable and conduit runs through studs and joists, plumbing penetrations, bolt holes in framing, rough openings, hidden structural work |
| Usable with restrictions | Glass fibre (FRP / GRP), PVC and soft plastics — see the material section before you commit |
| Not suitable for | Metal, masonry, concrete, visible finish work, flat-bottomed holes, overlapping holes, angled entries |
| Shank torque context | A 1/4″ hex shank is commonly rated in the 50–100 N·m band; a round shank in a three-jaw chuck is lower, and chuck grip force drops measurably once the jaws carry oil |
| Packaging | Moulded case, fabric roll, PVC pouch or blister card; OEM artwork and private label |
| Quality system | 100% inspection before shipment; ISO 9001:2015 quality system (confirm scope and certificate number before publishing as a product certification) |
The three things that always go wrong
None of the three is a defect, and none of them can be ground out of the tool. They are what you get in exchange for speed and price. Knowing the mechanism is what makes them manageable.
| Failure | Mechanism | What it looks like | What actually fixes it |
|---|---|---|---|
| It wanders on entry | The centre point is a small brad tip that presses into the timber to locate. It does not cut a circle. Once the lips engage, the flat paddle has no circumferential guide, so if one lip meets a knot, a resin pocket or sloping grain it cuts more freely than the other and the bit walks toward the easier path. | Hole centre is off the mark, often by 1–2 mm; the entry is ragged on one side; on end grain the bit can visibly skate before it bites. | Start at low speed so the outer spurs score a full circle before the lips load up; drill a short pilot hole first; keep the tool perpendicular. A purpose-made centring bit is the reliable answer — our Forstner bit set does not wander because its rim guides the cut from first contact. |
| It tears out on exit | The two lips scrape rather than shear, and there is nothing behind the final millimetre of timber to support the fibres. The bit does not cut through — it pushes through. | A ragged, splintered crater on the far face, often larger than the bit diameter. Measurements from controlled tests put exit tear-out on a spade bit at roughly 0.030″ in pine and 0.045″ in oak, against 0.002″ and 0.008″ for a Forstner — an order of magnitude difference. | Stop before breakthrough: drill until the centre point just appears, withdraw, flip the work and finish from the far side using the mark the point left. If you cannot flip it, clamp a sacrificial backer board. Reduce feed pressure over the last fraction of the cut. |
| It overloads its own shank | Torque enters at a 6.35 mm hex section and is applied at a radius up to 19 mm — roughly a six-to-one lever. A big paddle meeting a knot in wet hardwood produces a torque spike that a 1/4″ shank and a hand-held chuck are not sized for. | The bit spins in the chuck and the shank develops rounded flats; the drill’s clutch slips; in the worst case the paddle twists visibly or the shank cracks. | Drop to a larger diameter only with a low-gear, high-torque drill or a drill press; add a side handle above 25 mm; use impact-rated bits if you must run an impact driver, and read the shank section below before you do. |
Anatomy of a paddle bit
Five features do all the work, and each one has a rule about which face you may file. Getting the rule wrong is how a serviceable bit becomes scrap.
| Feature | What it does | Sharpening rule | If you get it wrong |
|---|---|---|---|
| Centre point (brad / spur tip) |
Locates the bit at start-up and anchors it against walking. It presses in rather than cutting, which is exactly why it locates imperfectly. | Rarely needs work. If rounded or bent, one light stroke per side with a needle file — and replace the bit if it is badly bent, because a misaligned point cannot be corrected by hand. | A rounded point makes the bit skate across the surface and start off-centre; that is then carried through the whole hole. |
| Cutting lips (the two wings) |
Remove nearly all of the material. They are broad, flat and cheap to grind, which is the entire economic case for the tool. | File the top bevel face only, keeping the factory angle, and use the same number of strokes on both sides. | Unequal lips make the bit cut oversized and off-centre, and it will chatter. This is the most common sharpening mistake. |
| Outer spurs | Score the grain boundary ahead of the lips. They are what makes the entry edge tolerable rather than shattered. | Touch up the inside face only, one or two light strokes. | Filing the outside of a spur reduces the bit’s diameter. The hole gets smaller and the spur geometry is destroyed. This is unrecoverable. |
| Paddle face | Carries the lips and gives the bit its section. Some premium designs curve it (a parabolic face) to throw chips out faster. | Never file. It is not a cutting surface. | Thinning or dishing the paddle weakens it; a bent paddle makes the bit wobble and cut oversized. Retire the bit. |
| Chip groove / clearance face | Gives the chips somewhere to go. Capacity is small — this is the depth limiter, not the shank length. | Keep it clean. Resin and packed dust reduce capacity and raise temperature. | A packed groove overheats the bit, burns the hole wall and can seize the bit in the work. |
| Shank | Transmits all the torque. On this set, a 1/4″ hex for quick-change and impact-driver compatibility. | No sharpening. Keep it clean and dry. | Oil or resin on the shank measurably reduces grip; a shank rounded by a slipping chuck will never hold again. |
Wood, fibreglass and PVC — three materials, three failures
Our product listing describes this kit as suitable for precise drilling in wood, fibreglass and PVC. That sentence needs one correction and two qualifications, and buyers who read it literally get burned — so here is the honest version.
| Material | What a flat bit genuinely does well | The failure you should expect | Precautions that are not optional | Cleaner alternative |
|---|---|---|---|---|
| Softwood, construction timber, plywood, MDF | Fast, cheap through-holes. Two to three times the speed of a premium boring bit in pine and SPF; a fraction of the cost per hole. This is the material the tool was designed for and the only one where it needs no apology. | Wandering on entry, tear-out on exit, burning in resinous stock and MDF if chips are not cleared. | Backer board or flip-and-finish for any visible face; clear chips by the depth schedule below; drop speed in hardwood and engineered sheet. | For visible or dimensioned holes, a Forstner bit; for deep holes, an auger bit. |
| Glass fibre / FRP / GRP | Can open a large rough hole quickly in thick laminate where a hole saw would be slow. | The aggressive wings are designed to tear wood fibres, and on a brittle gel coat they instead catch and shatter it — chunking, where pieces of the finish break away from the laminate. Expect exit-side delamination as well. The dust is respirable glass. | Clamp a backer board; run at low speed with light feed; use extraction at the source; wear a respirator and eye protection. Never use on a visible gel-coat face. | Fine-tooth carbide or diamond-grit hole saw. On thin panels, a step drill bit. |
| PVC and soft plastics | Opens a hole in thick section or pipe where a twist bit would be slow. | Thermoplastics soften and melt under friction rather than cutting. The result is a gummy residue packed into the chip groove, a smeared and discoloured hole wall, and a bit that suddenly grabs as the molten material re-solidifies around it. | Low speed, light feed, withdraw frequently to clear and cool. Watch for the smell of overheated plastic — it is the early warning. | A step drill bit on sheet and panel; a sharp twist bit at low speed for thick section. |
| Metal, masonry, concrete | Nothing. Do not. | A paddle bit has no cutting geometry for metal and no carbide for masonry. It will dull instantly in steel and be destroyed in concrete. | — | HSS twist drills for metal (see our HSS twist drill bit set); masonry bits for masonry. |
Chip clearance and how deep you can really go
The depth limit on a paddle bit is not the length of the bit. It is the fact that a paddle has no helical flute to pump chips out — it pushes them ahead of the blade, and the further they have to travel, the more likely they are to pack. Past roughly three times the diameter, packing becomes the dominant failure mode: temperature climbs, the hole wall scorches, and the bit can seize.
| Depth-to-diameter ratio | Back the bit out every | Heat risk | Adjustment |
|---|---|---|---|
| Under 1.0× | 8–10 seconds | Low | Steady feed is fine. No special measures. |
| 1.0× to 2.0× | 6–8 seconds | Moderate | Withdraw fully between passes rather than just easing off. |
| 2.0× to 3.0× | 4–6 seconds | Raised | Reduce speed by 10–15%. |
| Over 3.0× | 3–5 seconds | High | Slower speed, backer support, and consider whether this should be an auger job. |
What a standard bit will reach
- 150 mm (6″) bit: roughly 125 mm in softwood, 75–100 mm in hardwood.
- 300 mm (12″) bit: roughly 250 mm in softwood, 150–200 mm in hardwood.
- These are working figures, not specifications — resinous softwoods pack sooner, and a dull bit packs sooner than a sharp one regardless of species.
Three signals that chips are packing
- The chips change character. Coarse shavings turning to powder or dust means the bit is rubbing rather than cutting.
- The hole wall darkens. Scorching is heat, and heat in a paddle bit means the groove is full.
- Speed drops under constant trigger. The motor is loading up because the bit is pushing packed chips instead of cutting wood.
Any one of the three: withdraw fully, clear the groove, and resume slower. If the bit is already discoloured, let it cool before it goes back in — a hot paddle in resinous timber will gum up instantly.
Six signals that you should not be using a flat bit
This is the procurement question, and it is cheaper to answer before the hole is drilled than after. If any of these six applies, the flat bit is the wrong tool and no technique will rescue it.
| Signal | Why the flat bit cannot do it | Use instead |
|---|---|---|
| The bottom of the hole has to be flat | The centre point leaves a pointed or cupped bottom by design. Hinge cups, shelf pins, dowel stops and plug counterbores all need a flat floor. | Forstner bit set or a single Forstner bit in the size you need. |
| The hole will be seen | Rough, fibrous walls and exit tear-out are inherent to scraping geometry. Sanding a spade-bit hole back to acceptable is a real labour cost. | Forstner for the finish pass; brad point where the bottom does not matter. |
| You need to cut at an angle, or overlap an existing hole | With no rim, the paddle catches on the edge of the existing hole and wrecks the wall. It cannot start on a slope. | Forstner — its rim lets it start inside an existing hole and cut a clean overlap. |
| The hole is deeper than about 3× diameter, or you are drilling deep holes all day | Chip packing dominates, and the constant withdrawal cycle kills the speed advantage that justified the tool. | Auger bit set or single auger bits — the spiral flute clears for you. |
| The material is thin sheet — metal panel, plastic, laminate | The paddle grabs on breakthrough and can deform or tear thin material outright. | Step drill bit set or a single step bit. |
| Tolerance tighter than about 0.5 mm | ±0.5–1.0 mm is what the geometry delivers. Asking for better from a paddle is asking for a different tool. | Forstner at ±0.1–0.2 mm; ream or bore to size if the tolerance is genuinely tight. |
A method that avoids all three failures
Eight steps, in order. Steps 1–3 address wandering, steps 4–7 address tear-out, and step 8 is the one that protects the shank.
- Mark and prepare the entry. Mark the centre clearly. On a finished or veneered surface, apply masking tape over the mark — it holds the surface fibres down at the moment of contact and is the cheapest tear-out insurance there is.
- Make a pilot hole. A short pilot with a small twist bit gives the centre point somewhere to sit. This is the single most effective fix for wandering, and it costs five seconds.
- Start slow and let the spurs score. Run the bit at low speed until the outer spurs have cut a full circle on the surface. Only then increase to working speed. Rushing this step is what makes a flat bit skate.
- Stay perpendicular and feed steadily. Do not rock the drill to “help” the bit. Let the tool cut; forcing it raises torque and heat without raising removal rate.
- Clear chips on the depth schedule. Withdraw fully at the interval your depth-to-diameter ratio calls for. Full withdrawal, not just easing the pressure.
- Watch for breakthrough and stop early. As the centre point approaches the far face, reduce feed pressure. The moment the point appears, stop.
- Flip and finish from the far side. Use the small mark the centre point left as your guide. This gives you a clean entry and a clean exit, and it is the only method that reliably does both. If the work cannot be flipped, a tightly clamped sacrificial backer board is the substitute — not the equal.
- Match the machine to the diameter. Above about 25 mm, use low gear and a side handle, or a drill press. Shank overload is a machine-selection problem, not a technique problem.
Matching the bit to the machine
The constraint is torque, not power. Torque enters through a 6.35 mm hex section and is applied at the lip radius, so the bigger the bit, the more the shank and the chuck become the limiting component. Published figures put the practical ceiling for a 1/4″ hex shank in the region of 50–100 N·m; a round shank gripped in a three-jaw chuck is lower, and chuck grip force drops by roughly 30% once the jaws carry oil. That is the supply side. The demand side is set by diameter, species and moisture content.
| Bit diameter | Recommended machine | Gear / setting | Why |
|---|---|---|---|
| 6–13 mm | 12 V or 18 V cordless drill; impact driver if the bit is impact-rated | High speed is acceptable | Torque demand is well inside the shank’s capacity. This is the range where quick-change hex really pays. |
| 16–25 mm | 18 V cordless drill with a side handle | Low gear (high torque) | Demand roughly triples with diameter. Low gear keeps the motor in its efficient band and away from clutch slip. |
| 25–38 mm | High-torque drill, right-angle drill, or drill press | Lowest practical speed, firm two-handed control | This is where a 6.35 mm shank is genuinely the weak link. Expect clutch slip, and expect a knot to stop the bit dead. |
| Any diameter | Drill press | Lowest belt setting above 25 mm | Fixes three problems at once: perpendicular entry, controlled feed, and the torque reserve of a larger spindle. |
Set architecture and the metric / inch trap
Flat bit sets are quoted in both systems, and the two do not land on the same numbers. For most rough work the difference is irrelevant — and noticing why it is irrelevant is the useful insight.
| Metric size | Nearest inch size | Actual inch equivalent | Difference | Does it matter here? |
|---|---|---|---|---|
| 6 mm | 1/4″ | 6.35 mm | 0.35 mm | No |
| 13 mm | 1/2″ | 12.70 mm | 0.30 mm | No |
| 19 mm | 3/4″ | 19.05 mm | 0.05 mm | No |
| 25 mm | 1″ | 25.40 mm | 0.40 mm | No |
| 32 mm | 1-1/4″ | 31.75 mm | 0.25 mm | No |
| 38 mm | 1-1/2″ | 38.10 mm | 0.10 mm | No |
Choosing a set size
- 6 pc (typically 6 / 10 / 13 / 16 / 19 / 25 mm): covers the overwhelming majority of cable, conduit and bolt-hole work. The right default for a general trade kit.
- 8 pc: adds the sizes that turn up on plumbing and larger fixings.
- 13 pc: adds finer increments. Worth it only if your work has a reason to need an exact size — and if it does, check whether you should be using a Forstner for those holes anyway.
- Length: 150 mm is the standard. Specify 300 mm if your work is deep joists or double studs, and accept that a long paddle flexes more and wanders more.
Troubleshooting
| Symptom | Cause | Fix |
|---|---|---|
| Bit will not bite, skates on the surface | Centre point rounded or blunted | Refresh the point with a needle file, or drill a pilot hole. If the point is bent, replace the bit. |
| Hole oversized, or three-lobed rather than round | Cutting lips of unequal length, or a bent paddle | Re-file both lips with an equal stroke count. If the paddle is bent, retire the bit — filing will not fix runout. |
| Ragged entry edge | Outer spurs dull | Light touch-up on the inside faces of the spurs. Dull spurs are the leading cause of an ugly entry. |
| Exit face splintered or cratered | No support behind the fibres, too much feed pressure at breakthrough | Flip and finish from the far side, or clamp a backer board. Reduce pressure over the last fraction of the cut. |
| Smoke, scorched hole wall | Chips packed in the groove, speed too high | Withdraw fully, clear the groove, resume at lower speed. Let a discoloured bit cool before continuing. |
| Bit spins in the chuck | Round shank under high torque, oily or worn chuck jaws | Clean the jaws, use the hex shank in a hex holder, or move up to a larger drive. If a shank has developed rounded flats, it will never grip again. |
| Bit seizes or the drill stalls | Knot or dense grain; torque demand exceeded the machine | Release the trigger immediately, reverse out. Do not force it — this is how paddles twist and shanks crack. |
| Gummy residue packed in the groove (plastic) | Friction heat melting the material | Stop, clean the groove, drop the speed substantially and withdraw more often. On sheet, switch to a step bit. |
OEM & wholesale
Flat bit sets are among the most configurable items in a drilling catalogue, because the variables that matter to a buyer — size range, count, length, finish and packaging — are all independent of one another.
| Variable | Standard | Available options |
|---|---|---|
| Size range | 6–38 mm | Metric or inch ladder; any start and end point; custom increments |
| Piece count | 6 / 8 / 13 pc | Any count; size list specified by the buyer |
| Length | 150 mm | 300 mm long-reach; mixed sets (large sizes long, small sizes short) |
| Body / finish | Carbon steel, titanium coated | Bright, black oxide, titanium coating — see our coating comparison for what each finish actually buys |
| Shank | 1/4″ hex | Quick-change groove; impact-rated heat treatment; three-flat shank for large diameters |
| Geometry upgrades | Standard paddle | Parabolic chip-clearance face; chamfered lip corners; multi-point tip for reduced entry tear-out |
| Size marking | Stamped | Laser-etched high-contrast marking — worth specifying, because a set whose sizes have rubbed off is a set nobody uses |
| Packaging | Moulded case | Blow-moulded case, ABS index cassette, fabric roll, PVC pouch, blister card; private-label artwork |
| Logistics | Standard export carton | Moisture protection for sea freight; barcoded labels; drop-tested cartons |
MOQ is 100 sets for standard configurations — piece count, size range and packaging can be mixed within a container subject to confirmation. Indicative wholesale pricing for a 6 pc set is in the USD 8–45 band depending on size range, finish, length and packaging; confirm current terms before quoting your own customers. Lead time is typically 5–10 days for standard configurations after advance payment, and 15–30 days for customised sets. Samples are available for testing after price confirmation; the sample fee is refunded against a subsequent official order. Payment terms: T/T, L/C, D/A, D/P, PayPal according to circumstance.
Frequently asked questions
Are flat bits and spade bits the same thing?
Yes. Flat bit, spade bit and paddle bit are three names for the same tool: a flat steel blade with a centre point, two cutting lips and two outer spurs. The name varies by region and by catalogue; the geometry does not. Flat bit is the common term in UK and export catalogues, spade and paddle bit are the common North American terms.
Can a flat bit drill a precise hole?
Not in the sense most buyers mean. A flat bit typically holds bore diameter to within ±0.5 to 1.0 mm, against ±0.1 to 0.2 mm for a Forstner bit — roughly five to ten times looser. It also leaves a pointed or cupped bottom, not a flat one, and its entry position depends on a centre point that locates by pressure rather than by cutting. It is accurate enough for a cable run through a stud or a bolt hole through a frame, and not accurate enough for hinge hardware, dowels or any hole that will be seen.
Why does my spade bit wander when it starts?
Because the centre point is a small brad or spur tip that presses into the timber to find its position, and because the flat paddle has no circular rim to steady it once it is in. On the first few millimetres the two lips are the only thing locating the bit, so if one side meets a knot, a resin pocket or sloping grain it cuts more easily than the other and the bit walks toward the path of least resistance. Fixes, in order of effectiveness: start at low speed so the spurs can score a full circle before the lips engage, make a small pilot hole first, and keep the drill perfectly perpendicular. A Forstner bit does not have this problem because its rim guides the cut from the moment it touches the surface.
How do I stop tear-out on the exit side?
The single most effective method is to stop before you break through. Drill until the centre point just appears on the far face, withdraw, flip the workpiece and finish from the other side, using the small mark the centre point left as your guide. That gives a clean entry and a clean exit. If the workpiece cannot be flipped, clamp a sacrificial backer board tightly against the exit face — the bit continues into the backer, which supports the fibres as it breaks through. Two supporting measures: reduce feed pressure for the last fraction of the cut, and run a lower speed. A backer board is not optional on veneered plywood or visible faces.
Can I use these bits on fibreglass?
Only for rough holes that will not be seen, and only with precautions. A paddle bit is designed to tear through wood fibres, and that same aggressive action catches and shatters a brittle gel coat, producing chunking — pieces of the finish breaking away from the laminate — plus delamination at the exit side. Drilling composites also generates respirable glass dust. If you do use one: clamp a backer board, run at low speed, keep the feed light, use dust extraction and wear a respirator, and never use it on a visible face. For a clean hole in glass fibre use a fine-tooth carbide or diamond-grit hole saw, or a step bit on thin panels.
Can I use a flat bit on PVC?
Yes, but heat is the whole problem. Thermoplastics soften and melt under friction rather than cutting cleanly, so the failure mode is a gummy residue packed into the chip groove, a smeared hole wall and a bit that suddenly grabs. Run at low speed, use a light feed, and withdraw frequently to clear the groove and let the bit cool. On thin PVC sheet and panels a step bit gives a far cleaner round hole with no melting.
What speed should I run a flat bit at?
Slowly, and slower as the diameter grows. The governing problem is not cutting speed but heat: a large paddle generates far more friction than a twist drill of the same nominal size, and resinous or dense timber burns before the operator notices. As a working rule, drop the speed as diameter increases, drop it again for hardwood and for MDF or plywood, and treat any darkening of the hole wall or a change from shavings to powder as a signal to slow down and clear chips. On a drill press, use the lowest belt setting for anything above about 25 mm.
Can I use a spade bit in an impact driver?
Only if the bit is specifically impact-rated, and even then a large spade bit is a poor match for an impact driver. Two separate issues. First, an impact driver delivers its torque in rotational hammer blows, and a flat paddle has very little torsional give, so a standard bit can twist or crack at the shank. Second, the 1/4″ hex shank is the torque bottleneck: it is a 6.35 mm section asked to drive a cutting diameter of up to 38 mm, and published figures put the practical ceiling for that shank in the region of 50–100 N·m. A big paddle bit meeting a knot in wet hardwood can exceed that. For diameters above about 25 mm use a low-gear, high-torque drill with a side handle, or a drill press. Never use hammer mode — a rotary hammer’s blows are axial, not rotational, and will destroy a wood bit in seconds.
How do I sharpen a flat bit?
With a fine mill file or a diamond file, by hand, and only on the faces that do not set the diameter. File the top bevel face of each of the two cutting lips, keeping the factory angle, and use the same number of strokes on both sides so the bit stays balanced — unequal lips make an oversized, off-centre hole. Touch up the outer spurs from their inside faces only, one or two light strokes; filing the outside of a spur reduces the bit’s diameter. Refresh the centre point only if it is rounded or bent. Finish by laying the file flat on the back of each wing for a single light pass to remove the burr. Do not use a bench grinder or a rotary tool — the heat draws the temper out of the steel and the edge will not hold. Test in scrap: a sharp bit pulls itself in and throws coarse shavings, not dust.
How deep can a flat bit drill?
The practical limit is set by chip clearance, not by the length of the bit. A paddle has no helical flute to pump chips out, so past roughly three times the diameter, packing becomes the dominant failure mode and the bit starts to overheat and burn the hole wall. Back the bit fully out every 8–10 seconds below 1× diameter, every 6–8 seconds between 1× and 2×, every 4–6 seconds between 2× and 3×, and every 3–5 seconds beyond that, with the speed reduced 10–15%. A standard 150 mm bit will typically reach about 125 mm in softwood and 75–100 mm in hardwood; a 300 mm bit about 250 mm in softwood and 150–200 mm in hardwood. For deep, clean, repeated holes use an auger bit instead — its spiral flute does the clearing for you.
Can I get a custom size range or my own packaging?
Yes on both. Size range, piece count, length, finish, shank treatment, size marking and packaging are all independent variables, so a private-label set can be specified from the table in the OEM section above. MOQ is 100 sets for standard configurations; confirm the exact mix before quoting. Samples are available for testing after price confirmation.