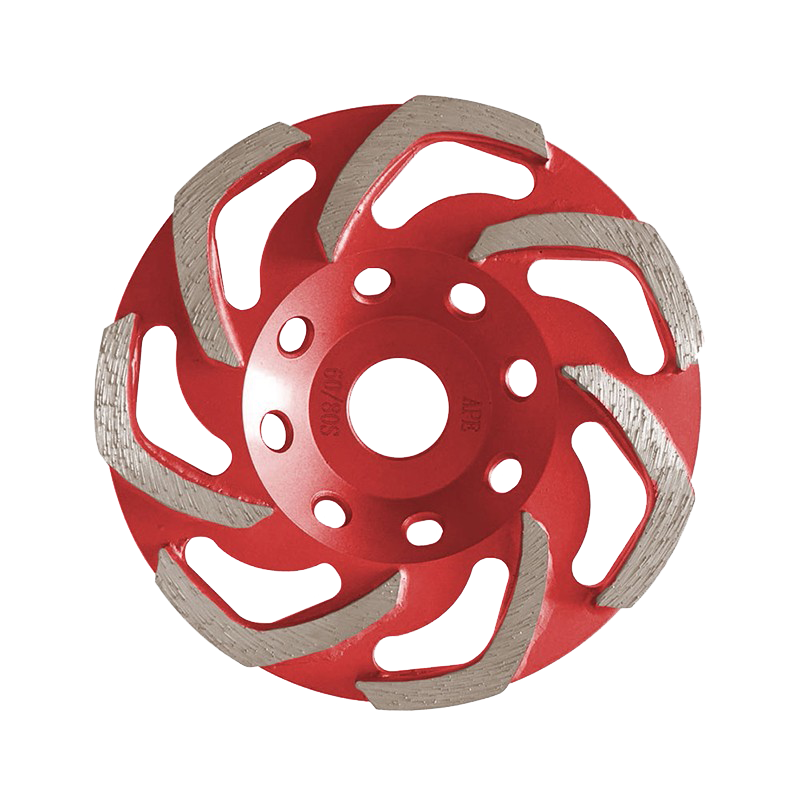

Product Overview
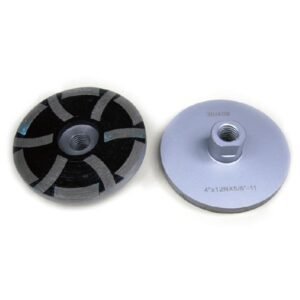
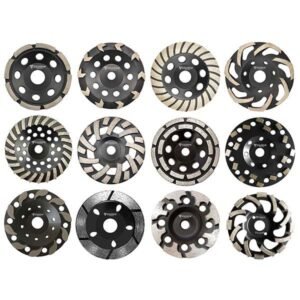
The fan shape cup wheel is the coating stripper of the GUSHI diamond cup range. Where the T segment cup wheel is built to take a surface down and the L shape cup wheel is built to grind stone and tile, this one is built to take something off: epoxy, urethane, glue, mastic, paint, curing compound, levelling compound. It is the wheel that turns a failed floor back into bare, coatable concrete.
Two features carry the job. The first is the swept fan segment, whose angled leading edge planes rather than chisels, so a soft film comes away in flakes instead of smearing. The second is the open ring of gullets between the segments, which does not merely give the debris somewhere to go — the curve of each fan blade and the gullet behind it form an impeller that actively throws material outward. On a coating job that self-clearing behaviour is not a convenience, it is the difference between a wheel that keeps cutting and a wheel that spends the afternoon re-grinding its own swarf.
It is a metal-bond diamond wheel on a powder-coated body, usable dry with a dust shroud and extractor or wet with a water feed. Change the grit and the bond and the same body covers everything from stripping thick coatings at #16/20 through to final preparation at #60/80.
Who this wheel is for: flooring contractors stripping coatings before a new resin system, remediation and maintenance crews taking paint and sealer off plant and warehouse floors, tilers and screed crews clearing adhesive and levelling compound, restoration crews working on concrete that has been coated more than once, and distributors who want a coating-removal SKU family that covers concrete and screed under their own brand.
How a Fan Segment Strips a Coating
The fan shape is not styling. It changes three things about how the wheel meets a coating, and all three are things you can feel within the first few feet.
The angled edge planes; a square edge chisels
A straight radial block arrives at the coating square-on. Every tooth strikes the film like a chisel, the film compresses and heats before it shears, and on anything soft or rubbery it does not shear at all — it deforms, smears and re-bonds to the concrete a moment later, now hot and sticky and spread over the pores you were trying to open. The fan segment avoids this because its leading edge is swept back at an angle. That converts the tooth into a planing cut: the film is lifted and sheared progressively along the edge instead of being struck head-on. Hard, brittle coatings such as two-pack epoxy chip away cleanly either way, which is why straight segments get away with it on those jobs. On paint, sealer, adhesive and mastic — the soft half of the coating world — the angled edge is the difference between stripping and smearing.
The gullet is an impeller, not just a hole
Between neighbouring fan segments the body is cut away, and because the segment behind each gullet is curved, the ring of segments behaves like the impeller of a centrifugal fan: material is scooped and flung outward and rearward rather than carried round with the wheel. That is where the name comes from, and it is worth understanding what it buys. On a closed or tightly segmented rim, a particle of stripped coating travels round the rim, meets the next segment still in place, and gets re-cut — which turns a flake into a smear and a smear into a gum. On this rim it is thrown clear before the next tooth arrives. The same channel serves the air stream that keeps the segment cool, which is the difference between a coating that lifts and a coating that melts.
Progressive engagement, so the grinder does not snatch
A fan segment contacts the work with its point first and rolls its body into the cut behind it. That gradual ramp is the reason this wheel stays controllable on the messy surfaces coating removal actually involves: a seam where mastic meets bare concrete, the raised lip of a peeling epoxy patch, the ridge at the edge of a poured topping. A block segment lands flat and hits those edges as a single hard event, and the grinder kicks. A sweeper segment lets you walk the machine across them without hanging on to it. If you have ever had a grinder twist out of your hands on a coating job, this is the geometry that stops it happening.
Reading the swarf tells you whether it is working
You do not need instruments to know whether the wheel is cutting or polishing. Stripping correctly, the wheel throws flakes, chips and dry-looking powder out of the gullets, the segment face stays dull grey, and the concrete left behind is pale, uniform and slightly rough to the touch. Stripping wrongly, you get dark gum, streak or drag marks on the floor, the segment face goes glossy and loaded, the note of the machine rises, and the surface left behind is shinier than the concrete next to it. That shiny surface is the problem: it is a polished substrate, and the next section explains why it will cost you the coating.
Which Method for Which Contaminant
A fan cup wheel is one of five ways to get a coating off a concrete floor, and it is not the right one every time. The table below is the honest scope of the tool.
| Dimension | Diamond fan cup (this product) | PCD cup wheel | Carbide scarifier | Shot blaster | Chemical stripper |
|---|---|---|---|---|---|
| Removes | Thin to medium coatings, adhesives, mastic, paint, sealer, levelling compound | Thick build epoxy, membranes, glue, anything gummy | Very thick coatings, toppings, ridges and trip hazards | Coatings, laitance, contaminants over large areas | Soft organics: mastic, adhesive, some paints |
| How it works | Grinds and planes with diamond | Shears, does not heat the film | Mills with rotating carbide cutters | Propels steel shot at the surface | Dissolves the bond |
| Profile left behind | CSP 1–3, uniform and open | Coarse, can cut grooves | CSP 4–6, aggressive and uneven | CSP 2–5, uniform over large areas | Whatever was there — no profile created |
| Risk to the substrate | Low, with light pressure | Moderate — will gouge if not kept moving | High — can damage the upper layer | Low | Low, but residue can poison the new coating |
| Edge and detail work | Best — handheld, gets to walls and corners | Best | Poor — floor machines only | Poor — cannot do verticals or edges | Moderate |
| Speed on an open floor | Moderate | Fast on the right coating | Very fast on thick material | Fastest on large slabs | Slow, and needs dwell and containment |
| Main limit | Slow against thick build epoxy and gummy mastic | Leaves a coarse finish; needs a diamond pass after | Damage and dust; needs a second method to refine | No edges, no verticals, no detail | Residue must be fully removed before coating |
The practical combination. Most coating jobs use two of these. A scarifier or PCD wheel to break the back of a heavy coating, then a diamond fan cup to strip what is left and open the concrete. On a large open slab a shot blaster handles the middle and the fan cup does the perimeter, the columns and the doorways. If the material is genuinely gummy rather than hard, start with PCD segments and finish with diamond — that is what the two tools are each good at.
Matching the wheel to the coating on the floor
The coating decides the grit, the bond and the speed. Getting this wrong in either direction is how a wheel either glazes or wears out in an afternoon.
| Coating / contaminant | Behaviour under a diamond | Grit and bond | Speed band | Note |
|---|---|---|---|---|
| Two-pack epoxy, urethane | Hard, brittle, chips and dusts | #16/20–#30/40 · hard bond | Medium | Thick build shears faster with PCD first |
| Cementitious self-leveller, topping | Hard, abrasive, eats the bond | #16/20–#30/40 · hard bond | Upper end of band | Slow the travel, not the speed |
| Paint, acrylic sealer, curing compound | Thin film, loads the face quickly | #30/40–#60/80 · medium bond | Medium | Quick passes; do not dwell, it burns in |
| Cut-back / black mastic, rubberised adhesive | Soft, smears, gums instantly | #16/20 · soft bond | Low — 30–35 m/s | Keep moving. Test for asbestos first. PCD may be the better tool |
| Tile and carpet adhesive residue | Gummy where thick, powdery where dry | #16/20 soft, then #30/40 | Low to medium | Two passes beats one heavy pass |
| Laitance, dust, weak surface layer | Cuts easily and quickly | #30/40–#80 · medium-hard bond | Medium | This is preparation, not removal |
Full Specifications
| Product name | Fan Shape Grinding Cup Wheels (diamond coating removal cup wheel) |
|---|---|
| Brand / manufacturer | GUSHI — Huzhou Gu’s Imp. & Exp. Co., Ltd. |
| Segment type | Swept fan / arrow segment, leading edge angled, welded to a dished body |
| Diameters | 100 mm (4″) · 115 mm (4.5″) · 125 mm (5″) · 150 mm (6″) · 180 mm (7″); other diameters to order |
| Segment count by diameter | Ø100: 6–8 · Ø115: 7–9 · Ø125: 8–10 · Ø150: 9–12 · Ø180: 10–12; custom counts to order |
| Segment height | 5 mm standard · 6 mm heavy-duty · 7.5 mm on request (quote height, not thickness) |
| Segment geometry | Swept fan, single ring, gullets between segments; open area typically 40–50% of the rim circumference |
| Diamond grit (FEPA D / mesh) | D251–D181 (#16/20) · D181–D151 (#30/40) · D151–D126 (#60/80) · D126–D107 (#100/120); #30/40 is the default first cut for coating removal |
| Bond | Metal bond, hardness soft / medium-soft / medium / medium-hard / hard, matched to coating and substrate |
| Diamond concentration | Standard 50 (≈2.2 ct/cm³); 25 and 75 available for light or heavy duty work |
| Body | Powder-coated steel body with cooling cut-outs; cast aluminium base option for reduced weight |
| Segment attachment | Resistance spot welding (standard) · high-frequency silver brazing · laser welding (heavy-duty, best impact resistance) |
| Arbor / bore | 22.23 mm (7/8″) · M14 · 5/8″-11 · M16 · M19; M14 and 5/8″-11 flanges supplied |
| Max rim speed | 80 m/s, tested to EN 13236. See the speed section below for the recommended coating-removal band |
| Grinding mode | Dry with dust shroud and rated extractor, or wet with a water feed |
| Net weight (approx.) | Ø100: 0.42 kg · Ø115: 0.55 kg · Ø125: 0.68 kg · Ø150: 0.95 kg · Ø180: 1.15 kg (steel body) |
| Balance / runout | Static balanced to G6.3 or better; face runout held tight to limit vibration on high-speed machines |
| Working temperature | Metal bond starts to soften around 150 °C at the matrix — keep the wheel moving and use water on heat-sensitive films |
| Applications | Epoxy, urethane and membrane removal · cut-back mastic and glue · tile and carpet adhesive · paint, sealer and curing compound · cementitious levelling compound · laitance removal and surface preparation · high-spot and trowel-mark levelling |
| Substrates | Concrete, screed, mortar, masonry, block. Not intended for steel or non-ferrous metal |
| Standard packaging | White box or individual blister card; branded colour box and laser marking to order |
| MOQ | 100 pcs standard · 500 pcs OEM / custom |
| Lead time | 5–10 days standard · 15–30 days OEM / custom after deposit |
| Payment terms | T/T · L/C · D/A · D/P · PayPal |
| Port of loading | Shanghai or Ningbo, China |
| Certification | ISO 9001 quality system · CE marking · EN 13236 conformity · RoHS on request |
Prices run roughly US$4–26 per piece depending on diameter, segment count, grit and bond. Send the coating type, the substrate and the area and we will quote the wheel that actually suits the job rather than the one you asked for.
Surface Profile and Coating Adhesion
This is the part of a coating removal job that decides whether the floor fails in two years, and it has nothing to do with how fast the wheel strips.
The profile is what the coating grips
A coating does not stick to concrete because it is sticky. It sticks because the prepared surface has a texture that the resin can flow into and key behind. The industry standard for describing that texture is the Concrete Surface Profile (CSP) scale from the International Concrete Repair Institute (ICRI), published as ICRI Technical Guideline 310.2, running from CSP 1 (nearly smooth, fine sandpaper) to CSP 9–10 (fractured aggregate, deep voids). Coating manufacturers publish the minimum CSP a product needs on its technical data sheet, and if the floor does not reach it, the coating can delaminate, blister or peel no matter how good the coating is.
| CSP | Texture | How it is produced | Typical coating system |
|---|---|---|---|
| CSP 1 | Nearly smooth, fine sandpaper | Light grinding, acid etch | Penetrating sealers, thin decorative films |
| CSP 2 | Light, coarse sandpaper | Fine diamond grinding | Thin-film epoxy up to ≈250 µm DFT, polyaspartic |
| CSP 3 | Medium-light, aggregate just beginning to show | Medium diamond grinding, light shot blast | Standard epoxy floors, urethane, anti-slip systems |
| CSP 4 | Medium, fine aggregate exposed | Coarse shot blast | High-build epoxy 1–3 mm, cementitious overlay |
| CSP 5 | Medium-heavy, coarse aggregate visible | Heavy shot blast | Thick epoxy mortar, heavy industrial floors |
| CSP 6–10 | Heavy to extreme, fractured aggregate and voids | Scarifying, bush hammering, scabbling | Structural overlays, repair mortars, resin injection |
Grinding gets you CSP 1–3, and that is a specification, not a shortfall
A diamond cup wheel with coating-removal grits lands the floor at CSP 1 to CSP 3. That is exactly right for the largest group of coating jobs: thin-film epoxies and urethanes up to about 250 microns dry film thickness, polyaspartic, sealers, stains and most anti-slip systems all specify CSP 1–3.
What a diamond wheel cannot do is reach CSP 4 or 5. This is worth stating plainly because it is a common and expensive misunderstanding on site: no number of extra passes with a diamond cup turns a CSP 2 floor into a CSP 5 floor. Grinding cuts the peaks level — it makes a surface flatter and uniformly roughened, but it does not fracture aggregate or tear open deep voids. Profile depth is a function of how the material is removed, not how long you do it. If the coating on the job specifies CSP 3–5 and above, the correct sequence is shot blasting or scarifying for the profile, with the fan cup used afterwards for the edges, the columns, the doorways and the detail work that no floor machine can reach.
Rule of thumb. Check the coating data sheet before you start, and match the method to the number on it. Grinder for CSP 1–3. Shot blast for CSP 3–5. Scarifier or scabbler for CSP 5 and up. Fitting the method to the spec costs an hour of planning; fitting it the other way round costs a floor.
The glazed wheel trap: how a wheel can make a floor uncoatable
Here is the failure that catches people out, and it is the strongest reason to treat a polishing wheel and a preparation wheel as two different tools. If your fan cup wheel glazes — the diamonds blunt, the matrix holds them, and the face goes smooth and glassy — the wheel stops cutting and starts rubbing. Rubbing with a fine, glazed wheel burnishes the concrete. It can leave the floor smoother than it was before you started.
A glossed, burnished, tightly sealed surface is the worst possible substrate for a coating: there is nothing for the resin to key into, and this is one of the classic routes to a coating that peels in sheets while looking perfectly applied. It is why the grit strategy on this page is coarse throughout — a #100/120 or finer wheel on a floor is a polishing tool, and a quick, gritty pass at #30/40 is worth more for adhesion than a long, polished one at #200, even though the second floor looks better before the coating goes on. If your wheel glazes, dress it and re-open it before you carry on, or you will be spending the next two hours making the floor harder to coat.
Moisture: the failure nobody blames on prep
A dry-looking slab is not a dry slab. Concrete emits water vapour from below, and if the emission rate exceeds what the coating can tolerate, the vapour pressure builds under the film and blows it off from underneath — usually as blisters, sometimes as a wholesale sheet failure months later. It has nothing to do with how well you ground the floor, which is exactly why it gets missed. Before any coating goes down, test. The three standard methods are an in-situ relative humidity probe (ASTM F2170, the most reliable, drilled holes stabilised for at least 72 hours), the calcium chloride test (ASTM F1869), and a non-destructive electronic moisture meter (ASTM F2659) for a fast preliminary reading. Compare the result against the coating manufacturer’s limit rather than a number you remember from another job. No cup wheel can fix a wet slab, and no coating will survive one.
Travel Direction and Working Practice
Two operators with the same wheel and the same coating get different results. The variables are how they walk the machine, how hard they push, and how long they stay in one place.
The pull stroke and the push stroke
A right-angle grinder’s spindle turns one way, so as the wheel rotates, the contact patch is always moving in a fixed direction relative to the machine. That gives you two ways to travel, and they do not behave the same.
- The pulling stroke (wheel rotating against your direction of travel). The teeth come in from the near side and the chip load builds gradually from nothing. The machine tends to push gently away from you, so it feels light, it steers easily, and it leaves the cleanest surface. This is the stroke to learn first, and for most coating removal it is the stroke you end up using.
- The pushing stroke (travelling with the rotation). The teeth bite at full depth on entry, so removal is faster — but the grinder pulls itself forward, and when a segment catches a mastic seam or a raised edge of coating the machine will kick toward you. On a heavy walk-behind machine with its mass on the floor this is manageable. On a handheld grinder, this is the stroke that twists out of people’s hands.
Because a fan segment is asymmetric, with a defined leading and trailing edge, the same wheel behaves noticeably differently in each direction. Run a 300 mm test patch one way, then the other, and look at what comes off. The correct direction throws the coating clear in flakes and leaves the concrete pale and open; the wrong direction drags and leaves glossy smear marks on the surface. Once you know, stay in that direction. It takes two minutes and it saves the whole job.
Keep moving: heat is what smears adhesive
Almost every coating-removal problem on site traces back to heat in the contact zone. Heat softens a coating that should have chipped, and a softened coating does not shear — it deforms, re-bonds and gums the wheel. The heat comes from three things under your control: dwelling in one spot, leaning on the machine, and running the wheel too fast. Fix all three. Keep the machine travelling at a steady, deliberate pace, let the wheel’s speed do the cutting rather than your body weight, and if the coating is soft, slow the wheel down. A grinder that is pushed hard and held still will polish a floor; a grinder that is walked steadily with light pressure lifts the coating off it.
Flatten, do not dish
Coating removal and floor flattening happen in the same pass, and it is easy to do the first while ruining the second. Any dwell over one area removes more material there, and repeated dwell marks become shallow dishing that will show through the new coating and may even exceed its tolerance. Overlap each pass by about half a wheel width, change direction on the next pass, and work in a deliberate pattern rather than wandering. Check the floor with a straightedge as you go — if a low spot is growing, you are dwelling on the high ground around it.
Machines and dust control
A handheld angle grinder covers edges, corners, doorways, columns, small rooms and detail work, and it is the only tool that reaches them. A walk-behind single-disc floor grinder handles larger open areas with the pressure set by machine ballast rather than by the operator, which makes it far easier to keep consistent. A planetary or counter-rotating machine leaves the flattest, most direction-neutral surface and is the best choice when the floor will be coated and inspected under raking light. Whichever you use, dry grinding requires a shroud on the machine connected to an extractor rated for the dust, and a fitted particulate respirator. Never use a household vacuum for this work.
Speed: Run It Slower Than You Think
Operators naturally reach for maximum rpm, and on coating removal that is usually backwards. Speed does not lift a coating off concrete — the diamond edge does that. What excess speed does is generate heat, and heat is the enemy of every soft film you are trying to remove.
The safety limit and the working band are two different numbers. The 80 m/s figure in the specification is the EN 13236 maximum; the band that actually strips coatings well is much lower, roughly 30 to 45 m/s at the rim. On a fixed-speed grinder there is no adjustment, so the diameter becomes your only lever: a Ø125 wheel on a fixed-speed machine spins at about 72 m/s, which is fast enough to polish rather than strip. Fit a smaller wheel, or use a variable-speed machine.
| Diameter | Max rpm at 80 m/s (EN 13236 limit) | Coating-removal band at 30–45 m/s | Notes |
|---|---|---|---|
| Ø100 mm | 15,300 | 5,700–8,600 | Edges, corners, small areas |
| Ø115 mm | 13,300 | 5,000–7,500 | Good compromise on a variable-speed machine |
| Ø125 mm | 12,200 | 4,600–6,900 | The commonest size; needs a speed control for soft coatings |
| Ø150 mm | 10,200 | 3,800–5,700 | Open floors on a walk-behind machine |
| Ø180 mm | 8,500 | 3,200–4,800 | Large slabs and machine-mounted work |
Two practical consequences. First, a variable-speed grinder earns its money on coating removal work — being able to drop to 5,000 rpm on a Ø125 wheel is what separates a clean strip from a smear. Second, if you are stuck with a fixed-speed machine, stepping down one wheel size does the same thing: a Ø100 wheel on the same grinder runs about 57 m/s instead of 72 m/s, which is slower, cooler and far more controllable on mastic and adhesive.
Test Before You Grind
Concrete dust is a known hazard, and the T segment cup wheel page covers the silica and extraction requirements in detail. Coating removal adds two hazards that come from the coating itself rather than the floor, and they are the reason this section exists.
Asbestos in old flooring adhesive. Black cut-back adhesive — the asphalt-based mastic trowelled under vinyl, asphalt and some wood flooring from roughly 1920 into the 1980s — commonly contains asbestos fibers, and so do many of the 9 inch (225 mm) square tiles laid over it. You cannot identify it by colour, age or feel; only a lab result settles it. Under OSHA 29 CFR 1926.1101, asphalt and vinyl flooring installed in 1980 or earlier is treated as asbestos-containing unless testing proves otherwise. Under EPA NESHAP (40 CFR 61.141), floor covering and mastic containing more than 1 percent asbestos is Category I non-friable material — and sanding, grinding, cutting or abrading it converts it into regulated asbestos-containing material. Grinding mastic is precisely that operation. Do not grind suspect adhesive. Have every layer sampled separately by an accredited inspector, ask the lab for gravimetric preparation or TEM confirmation of a negative result, and if it comes back positive the answer is encapsulation, a chemical stripper or a licensed abatement contractor — not a cup wheel.
Lead in old paint. Paint on concrete, walls and trim in buildings constructed before 1978 may contain lead. Grinding it dry without containment spreads lead dust through the whole structure, where it settles on surfaces and stays a hazard to occupants long after the job is finished — and in the United States, renovation work that disturbs painted surfaces falls under the EPA Renovation, Repair and Painting rule, with training, containment and cleaning requirements attached. Test before you grind, and if the result is positive, work to the applicable regulation rather than to your usual method.
The operating rule that covers both. If you cannot produce a current lab report for the coating you are about to grind, do not grind it. A test costs a fraction of an abatement, and a hand-held XRF or a mail-in bulk sample settles the question in days.
Everyday safety
- Check the wheel’s marked maximum speed against the machine’s no-load rpm before fitting. Never fit a wheel rated below the machine’s speed.
- Check the arbor and flange are correct and seated, and that the wheel runs true before applying load. A wheel with visible face runout will vibrate, chatter and dig holes.
- Wear eye protection, hearing protection, gloves and a fitted particulate respirator. Run a shroud and a rated extractor for dry grinding.
- Do not remove the guard to reach a corner. Use a smaller wheel instead.
- Let the wheel come to a complete stop before setting the machine down, and store cup wheels flat so the segments are not knocked.
Applications & Substrates
| Job | Substrate | Start at | Bond | Note |
|---|---|---|---|---|
| Strip two-pack epoxy or urethane coating | Concrete, screed | #16/20 | Hard | Thick build shears faster with PCD first |
| Remove cut-back mastic or rubberised adhesive | Concrete | #16/20 | Soft | Test for asbestos before disturbing it |
| Lift tile and carpet adhesive residue | Concrete, screed | #16/20 → #30/40 | Soft to medium | Two light passes beats one heavy pass |
| Remove paint, sealer, curing compound | Concrete, masonry | #30/40 | Medium | Keep moving; thin films burn in if you dwell |
| Take off cementitious levelling compound | Concrete | #16/20 | Hard | Very abrasive — expect to use more than one wheel |
| Level trowel marks, form marks and high spots | Concrete, screed | #16/20 → #30/40 | Hard | Flatten, do not dish — watch for dwell marks |
| Remove laitance before coating | New concrete | #30/40 → #60/80 | Medium-hard | Laitance is weak and must go before coating |
| Final preparation before a thin-film coating | Concrete | #60/80 → #80 | Medium-hard | Confirm the target CSP from the coating data sheet |
| Feather a patch repair into the surrounding floor | Concrete | #30/40 | Medium | Blend the edge; do not leave a shoulder |
| Dress block, brick and masonry before render | Masonry, block | #16/20 → #30/40 | Hard | Opens the surface for a mechanical key |
Not the right tool: a diamond cup wheel is not a metal-cutting or steel-grinding tool — diamond and steel do not get on, and the wheel will glaze rather than cut. For cutting metal use an abrasive or carbide wheel; for shaping and finishing floors once the coating is off, follow with a diamond grinding plate or the polishing sequence on the Concrete Floor Polishing Pads page.
How to Use a Fan Shape Grinding Cup Wheel
- Find out what you are removing. Identify the coating or adhesive, check the age of the building, and get the coating manufacturer’s required CSP from the data sheet. If the floor is pre-1980s construction with old adhesive or pre-1978 with old paint, arrange testing before anything is disturbed.
- Set the target before you start. Match the method to the required profile: grinding for CSP 1–3, shot blasting for CSP 3–5, scarifying above that. Choose the starting grit from the coating table on this page.
- Clear the area and control the dust. Fit a shroud to the grinder and connect a rated extractor, or set up water. Mask adjacent surfaces and doorways — debris travels further than expected.
- Test the moisture. Run an in-situ RH test or calcium chloride test before the floor is coated, and compare it against the coating’s limit. This is done before coating, not before grinding, but sorting it out early avoids coating a slab that should never be coated.
- Check the wheel against the machine. Confirm the wheel’s marked maximum speed is at least the machine’s no-load rpm, fit the correct arbor and flange, run it up to speed and check it runs true before it touches the floor.
- Run a 300 mm test patch each way. Walk the grinder one direction, then the other, and compare what comes off and what the floor looks like underneath. Pick the direction that throws flakes and leaves a pale, open surface, and stay with it.
- Work at the right speed. On a variable-speed machine, drop into the 30–45 m/s band for the wheel size. On a fixed-speed machine, step down a wheel size for soft coatings. Heat is what smears, and speed is what makes heat.
- Cut with light pressure and steady travel. Let the wheel do the work. Do not lean on the machine and do not stop in one place — a stationary wheel polishes, and a polished floor will not hold a coating.
- Overlap and change direction. Overlap each pass by about half a wheel width and cross the previous direction on the next pass, so the floor stays flat and the scratch pattern stays even.
- Do the edges and obstacles by hand. Use the handheld grinder flat and steady along walls, columns and doorways. Tilting the wheel to reach an obstruction is how finished floors get gouged. For edge detail technique, see the L shape cup wheel page.
- Watch for glazing, and fix it immediately. If the segment face goes glossy, the note rises and the floor starts getting shinier instead of rougher, dress the wheel with a dressing stick and re-open it before carrying on.
- Finish one step finer if a coating follows. After the stripping pass, take one pass at #60/80 to even the scratch pattern and remove the loose material the coarse grit left behind.
- Clean before you coat. Vacuum the floor with a rated extractor, remove all grinding residue and dust, and check the profile against the required CSP. Grinding dust left on the surface is an adhesion barrier in its own right.
- Keep the wheel stored correctly. Cup wheels are stored flat and dry, without weight on the segments. Knock a segment out of alignment and the wheel will vibrate for the rest of its life.
Frequently Asked Questions
What is a fan shape diamond cup wheel used for?
It is a coating-removal wheel. Typical jobs are stripping epoxy, urethane and membrane coatings, removing cut-back and black mastic, lifting tile and carpet adhesive, taking off paint, sealer and curing compound, and clearing cementitious levelling compound before a new floor goes down. Because the segments are aggressive and open, the same wheel also levels trowel marks, form marks and high spots on concrete and screed. It is the wheel you reach for when the job is to get a surface back to bare, coatable concrete rather than to put a finish on it.
How is a fan or arrow segment different from a straight segment?
Three ways, and all three matter on coating work. The leading edge is angled rather than square-on, so it planes the film off instead of chiselling into it — which is why a soft coating comes away in flakes instead of smearing. The curved segment and the wide gullet behind it act as an impeller, throwing debris clear instead of dragging it round to be re-ground. And contact is progressive: the point lands first and the body follows, so the grinder does not snatch when a segment meets a mastic seam or a raised edge. A straight radial block does none of those things, and on soft coatings it loads and polishes rather than strips.
Can this wheel remove epoxy, glue, mastic and paint?
Yes for thin to medium films and most adhesives. Thin paint, acrylic sealer, curing compound, tile and carpet adhesive residue and most two-pack epoxies and urethanes come off with a coarse grit and light pressure. Two cases need a different first tool. Thick build epoxy, self-levelling toppings and heavy membranes shear faster and safer with PCD segments, because PCD cuts through the film without heating it. And genuinely gummy material such as heavy cut-back mastic will load a diamond wheel unless you run it slowly with a coarse, soft bond — a PCD wheel or a chemical stripper is often the better answer there.
What grit do I need for coating removal?
Coarse: #16/20 to #30/40, with #30/40 as the default first cut. Step to #60/80 when you are finishing preparation before a thin-film coating, or when the coating is a soft film a coarse grit would cut straight through. Fine grits are a mistake here — a #100/120 or finer wheel is a polishing tool on a floor, it glazes, and a glazed wheel polishes the concrete rather than opening it, which is the opposite of what a coating needs.
What surface profile does grinding leave, and is it enough for my coating?
Diamond grinding leaves CSP 1–3 on the ICRI Concrete Surface Profile scale, which is correct for thin-film systems: epoxies and urethanes up to about 250 microns dry film thickness, polyaspartic, sealers and anti-slip coatings. If your coating specifies CSP 3–5 or higher, grinding alone cannot get you there — extra passes make a floor flatter and more uniformly rough, they do not create a deep fractured profile. That requires shot blasting or scarifying, with the fan cup used afterwards on edges and detail. Always work from the coating manufacturer’s current data sheet.
Should I grind wet or dry to remove a coating?
Dry with extraction is normal on a prepared site, because water turns the stripped coating into a slurry you then have to contain, and some adhesives slide around and re-bond under water. Run a shroud on the grinder connected to a suited extractor and wear a fitted respirator — never a household vacuum. Go wet when dust is the constraint, when the site cannot take airborne dust, or when heat is the problem: a trickle of 0.3 to 0.5 litres per minute on a handheld grinder keeps the segment cool and stops soft adhesive gumming. Do not grind wet if a lab report says the coating contains asbestos — that changes the whole method.
Why does my wheel gum up and the adhesive smear instead of coming off?
Heat, from three sources. Speed: a fixed-speed grinder on a Ø125 wheel runs about 72 m/s, fast enough to polish rather than strip — use a variable-speed machine lower down, or a smaller wheel. Pressure and dwell: leaning on the wheel and holding it still melts the adhesive into a gum that fills the pores of the segment; keep the machine travelling. Grit and bond: a fine grit or a hard bond on a soft, sticky coating is the wrong tool. The fix is a coarser grit, a softer bond, lower speed, faster travel — and on genuinely gummy jobs, a PCD wheel.
Do I need to test old floor adhesive for asbestos before grinding?
Yes, and it is the step that most often gets skipped. Black cut-back adhesive, standard under vinyl, asphalt and wood flooring from roughly 1920 into the 1980s, commonly contains asbestos, as do many of the 9 inch square tiles laid over it — and you cannot tell by looking. OSHA treats asphalt and vinyl flooring installed in 1980 or earlier as asbestos-containing unless a lab proves otherwise, and under EPA NESHAP, mastic over 1 percent asbestos becomes regulated material the moment it is ground, sanded or abraded. Have every layer sampled separately by an accredited inspector, and if the result is positive do not grind it: use encapsulation, a chemical stripper or a licensed abatement contractor.
MOQ, lead time, OEM and samples?
MOQ is 100 pieces for standard diameters, segment counts, grits and bonds. Custom body colour, segment geometry, arbor threads, grit range, bond hardness, laser marking and branded packaging are made to order with an MOQ of 500 pieces. Standard sizes ship in 5 to 10 days and custom production in 15 to 30 days after deposit. OEM and ODM are welcome with your own brand, colour, artwork and packaging. Samples are available at cost, with the sample fee returned against your first official order. Payment terms are T/T, L/C, D/A, D/P and PayPal, loading from Shanghai or Ningbo.
OEM & Wholesale
GUSHI has manufactured and exported diamond tools from Huzhou, Zhejiang since 2004, and supplies fan shape diamond cup wheels to flooring contractors, tool distributors and branded programmes in more than 20 countries. We are one of the 23 Chinese companies that won the diamond blade anti-dumping case for the USA market, with production capacity of 100,000 sets per month.
What we can build to your specification:
- Diameter from Ø100 to Ø180 mm and beyond, with custom segment counts and gullet geometry
- Segment height, fan angle, grit range and diamond concentration matched to your coating removal market
- Bond hardness from soft to hard, and PCD variants for the gummy-coating end of the range
- Steel or cast aluminium body, in your body colour and finish
- Arbor 22.23 mm, M14, 5/8″-11, M16 or M19
- Your brand, laser marking, artwork, blister card, colour box and carton