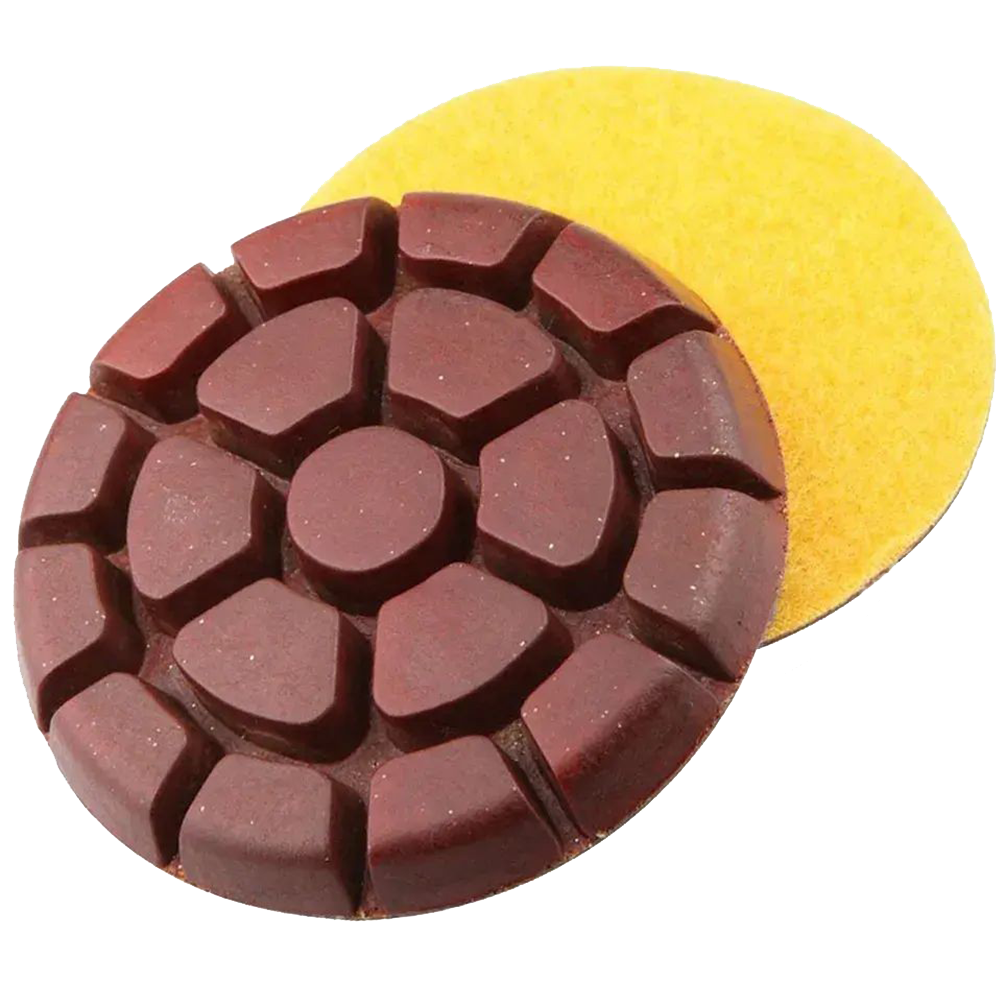
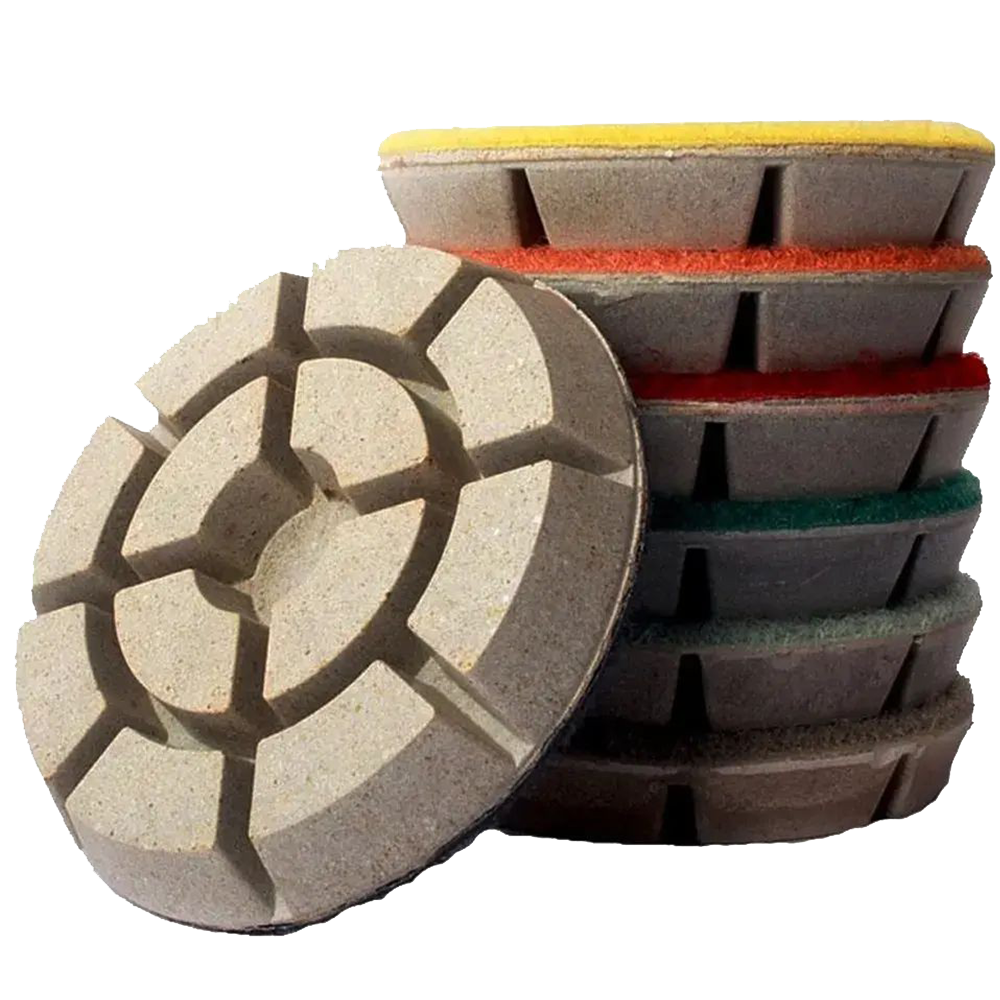
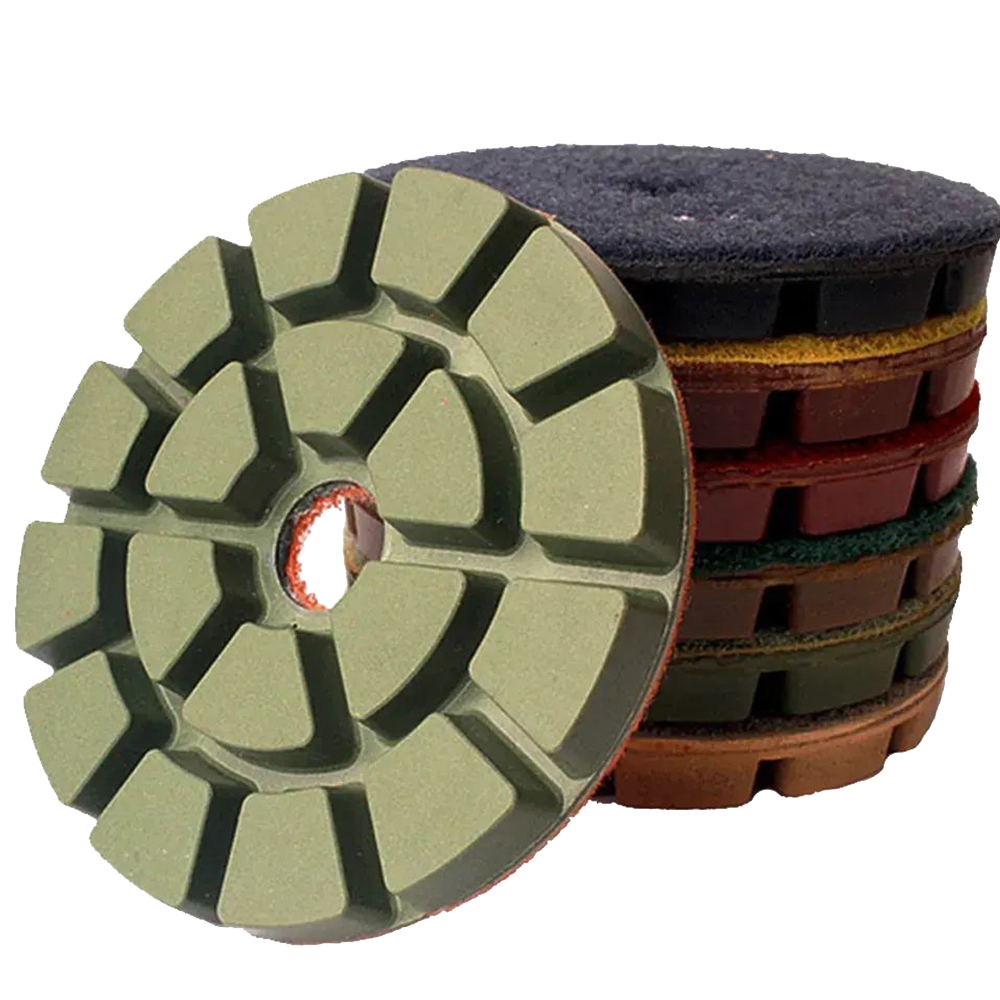
Full Specifications
| Parameter | Specification |
|---|---|
| Product type | Diamond floor polishing / grinding pads |
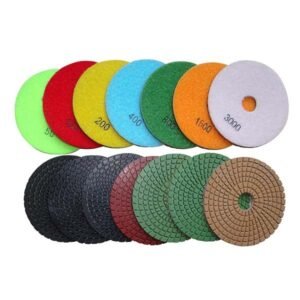
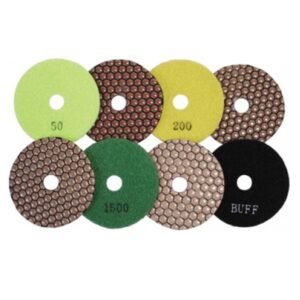
| Grit range | 30#, 50#, 100#, 200#, 400#, 800#, 1500#, 3000# (+ buff pad) |
| Bond type | Metal bond (30–50#) · Resin bond (100–3000#) · Buff (no abrasive / diamond micro-powder) |
| Diameter | 3 in / 4 in / 5 in / 7 in (≈80 / 100 / 125 / 180 mm) |
| Backing | Hook & loop (Velcro) — colour-coded by grit |
| Use | Wet or dry (formulation matched to method) |
| Abrasive | Synthetic diamond, high concentration |
| Hardness match | Hard bond for soft concrete · Soft bond for hard concrete |
| Compatible machines | Planetary floor grinders, walk-behind & ride-on grinders, angle grinders (with backing pad) for edges |
| Recommended speed | 2,000 – 4,500 rpm (do not exceed pad rated surface speed) |
| Finish levels | Matte (400#) · Satin (800#) · High-gloss (1500–3000#) · Mirror (buff) |
| Suitable for | Concrete, granite, marble, terrazzo, quartz, tile, stone |
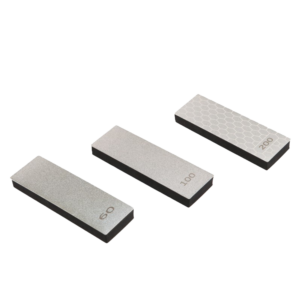
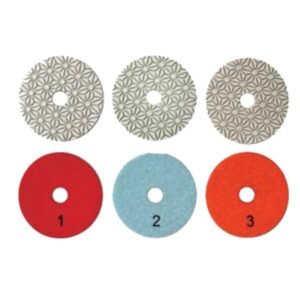
| Plate / segment | Flexible resin pad; rigid metal-bond puck for heavy grinding |
| Colour coding | 50# green/black · 100# black/red · 200# red/blue · 400# yellow · 800# white · 1500# brown · 3000# orange · buff black/white |
| Dust control (dry) | Shroud + approved HEPA extractor required |
| Packing | Half-set / full-set (e.g. 7-pad or 14-pad sequence) and bulk |
| Customisation | Grit, diameter, bond, wet/dry, colour, private-label box |
| MOQ | 100 pcs (grits, bonds, sizes mixable in one order) |
| Lead time | 5–10 days standard · 15–30 days custom |
| Certification | ISO 9001:2015; 100% QC inspection before shipping |
| Warranty | Covered within product usage life; fast return/exchange |
| Payment | T/T, L/C, D/A, D/P, PayPal |
| Origin | Huzhou, Zhejiang, China (factory since 1998) |
| Brand | GUSHI / Roycel |
How Floor Polishing Works — the Grit Sequence
A diamond pad is a disc of synthetic diamond held in a matrix. As the grinder spins, exposed diamond grit micro-scratches the floor, removing a thin layer each pass. Coarse grits cut deep and fast; finer grits remove the scratches the previous grit left behind. A polished floor is simply the result of stepping through grits until the only scratches left are too fine to see — at which point light reflects evenly and the floor looks wet.
The job is a four-stage chain. Skipping a stage, or a grit within a stage, leaves scratches that the next pad cannot erase and that only become visible after sealing — so the sequence is strict, always in-and-up.
The polishing process chain
| Stage | Grit | Bond | What it does | Surface result |
|---|---|---|---|---|
| Levelling / coating removal | 30# / 50# | Metal | Removes old epoxy, paint, glue; grinds down lippage and high spots | Matte, heavy scratches |
| Refining | 100# / 200# | Resin | Erases 50# scratches, begins to close the floor | Low sheen, smooth |
| Fine polishing | 400# / 800# | Resin | First true polishing; reflection appears | Clear reflective sheen |
| High-gloss | 1500# / 3000# | Resin + micro-powder | Burnishes to deep clarity | High-gloss mirror |
| Final buff | Buff pad (no/low abrasive) | — | Seals the shine with compound | Wet-look, sealed |
Colour coding — read the pad at a glance
The industry colour system lets a crew pick the next pad without reading fine print: 50# green/black, 100# black/red, 200# red/blue, 400# yellow, 800# white, 1500# brown, 3000# orange, buff black (dark stone) or white (light stone).
Metal Bond vs Resin Bond vs Buff Pad
The bond is the matrix that holds the diamond. It decides how fast the diamond is released — and therefore how the pad behaves on the floor. This is the real selection decision, more than brand.
| Dimension | Metal bond (30–50#) | Resin bond (100–3000#) | Buff pad |
|---|---|---|---|
| Matrix | Hard metal | Softer resin | No / low abrasive + compound |
| Diamond release | Very slow | Faster | None (burnish only) |
| Best for | Coating removal, lippage, levelling | Honing, satin, gloss | Final mirror seal |
| Floor it suits | Rough / coated / uneven | Already-flat floors | Polished floor |
| Life on job | Longest on aggressive work | Long, wears faster than metal | Short, final step only |
| Heat | High — watch water/pressure | Moderate | Low |
| Typical stage | 1st (levelling) | 2nd–4th (refine to gloss) | 5th (finish) |
In practice almost every job starts on metal bond, then switches to resin bond for the rest of the sequence, ending with a buff pad. Trying to polish with metal bond alone leaves a floor too rough; trying to level with resin bond alone glazes and stalls.
Match the Bond to Concrete Hardness
This is the most common, and most expensive, mistake on a concrete floor. The rule is counter-intuitive: bond hardness runs opposite to concrete hardness.
| Concrete type | Example | Use this bond | Why |
|---|---|---|---|
| Soft concrete | Newly poured, sandy, low strength; diamond digs in easily | Hard bond | Soft floor wears the matrix fast, so the diamond must be held longer to avoid wasting pads |
| Medium concrete | Standard slab, C25–C35 | Medium bond | Balanced release for general jobs |
| Hard concrete | Dense, C40+, slow to cut; pad glazes | Soft bond | Fresh diamond must be exposed fast enough to keep cutting |
Wet vs Dry Polishing
Both pad types are available; the choice is about the job site, not the floor.
| Factor | Wet polishing | Dry polishing |
|---|---|---|
| Water | Continuous stream required | None |
| Cooling | Excellent — no burn marks | Heat-resistant bond; can scorch if overspeed |
| Dust | Slurry, contained by water | Airborne — needs shroud + HEPA |
| Pad life | Longer | Shorter |
| Setup | Water source + slurry control | Faster, no water |
| Best for | Large indoor floors, light stone | On-site, no water access, edges |
Which Grit & Stage Do I Need?
By desired finish
| Finish target | Stop at | Sequence |
|---|---|---|
| Matte / honed | 400# | 50 → 100 → 200 → 400 |
| Satin / low-sheen | 800# | … → 400 → 800 |
| High-gloss | 1500–3000# | … → 800 → 1500 → 3000 |
| Mirror / wet-look | buff | full sequence + buff pad |
By starting condition
| Floor condition | Start at | Note |
|---|---|---|
| Rough, coated, uneven | 30# / 50# metal | Level and strip first |
| Flat, needs refinement | 100# / 200# resin | Skip metal stage |
| Already polished, light refresh | 400# resin | One or two steps |
Pro tip — clean between steps
Any 100# grit left on the floor will ruin the 400# or 800# pad. Vacuum or rinse the floor completely every time you change grit, and inspect under bright light before moving up. This single habit prevents most “mystery scratch” callbacks.
Applications & Compatible Machines
These pads are used wherever a hard, flat surface needs to be ground and polished to a finish:
| Application | Typical grit path |
|---|---|
| Industrial / warehouse floors | 50 → 200 → 400 (matte, durable) |
| Retail, showroom, garage | 50 → 800 (satin, easy clean) |
| Hotel lobby, gallery (mirror) | 50 → 3000 → buff |
| Terrazzo restoration | 100 → 1500 → buff |
| Granite / marble countertop edge | 50 → 3000 (wet, angle grinder) |
| Tile & stone surface refresh | 200 → 800 |
Machines: planetary floor grinders, walk-behind and ride-on grinders for large areas; angle grinders with a backing pad for edges, stairs and detail. Use a densifier between stages for an even, deeper shine.
For small-area edge work and countertop touch-ups, see our Diamond Sanding Sheets; for wall and vertical dry sanding, our Abrasive Sanding Discs. When moving polished slabs, our G-Ultra Lifter lifts them without marking the finished face.
OEM & Wholesale
Huzhou Gu’s Imp. & Exp. Co., Ltd. (GUSHI / Roycel) has manufactured and supplied diamond and abrasive tools since 1998, with its own factory and a 20-year supply chain. All pads run under ISO 9001:2015 with 100% QC inspection before shipping.
| Item | Detail |
|---|---|
| MOQ | 100 pcs (grits, bonds and diameters mixable in one order) |
| Customisable | Grit range, diameter (3/4/5/7 in), metal or resin bond, wet/dry formula, Velcro colour, private-label box and sleeve |
| Sample | Available — sample and freight fee returned on official order |
| Payment | T/T, L/C, D/A, D/P, PayPal |
| Lead time | 5–10 days standard; 15–30 days custom |
| Service | Fast return/exchange; covered within product usage life |
Preguntas frecuentes
Which grit should I start with on a concrete floor?
Start at the lowest grit that still removes material: 30 or 50 grit metal bond if the floor is rough, coated or needs levelling; 100 to 200 grit resin bond if it is already fairly flat. Always progress one step at a time — 50, 100, 200, 400, 800, 1500, 3000 — because skipping a grit leaves scratches that finer pads cannot erase.
What is the difference between metal bond and resin bond pads?
Metal bond holds diamond in a hard matrix that releases slowly, so it lasts on aggressive work like coating removal and levelling (30–50#). Resin bond holds diamond in a softer matrix that releases faster, giving the smooth cutting for honing and gloss from 100# to 3000#. Most jobs use metal first, then resin, then a buff pad.
How do I match the bond to concrete hardness?
This is counter-intuitive. SOFT concrete (new, sandy, low strength) needs a HARD bond, because a soft floor wears the matrix fast and you need the diamond held longer. HARD concrete (dense, C40+) needs a SOFT bond, so fresh diamond is exposed fast enough to keep cutting. Wrong pairing either stalls the job or burns pads in minutes.
Should I polish wet or dry?
Wet feeds water that cools the pad, carries slurry and extends life — best for large indoor floors and light stone. Dry needs no water and is convenient on site, but must run with a shroud and approved HEPA extractor because of silica dust. Both pad types are stocked; choose by water access and cleanup.
Can I skip grit steps to save time?
No. Each grit only removes the scratches the previous one left. Jumping 200 to 800 leaves 200-grit gouges beneath the shine that become permanent once sealed. Stay strict in-and-up: 50 → 100 → 200 → 400 → 800 → 1500 → 3000, and stop only at the agreed gloss.
What grinder speed should I run?
Keep planetary and walk-behind grinders at 2,000–4,500 rpm and never exceed the pad’s rated surface speed. Above ~4,500 rpm scorches the resin bond, discolours light stone and ruins the pad. Lower speed and moderate pressure on coarse grits; ease both as you move to finer grits.
Is dry concrete polishing safe?
Only with dust control. Cutting concrete releases respirable crystalline silica. Always fit the shroud, run an approved HEPA extractor, and wear a fitted mask, goggles and hearing protection. Wet polishing avoids airborne dust and is preferred in enclosed spaces.
What is the MOQ and what can be customised?
OEM MOQ is 100 pieces, with grits, diameters and bond types mixable in one order. Customisation covers grit range, diameter, metal or resin bond, wet/dry formula, Velcro colour and private-label packaging. Lead time 5–10 days standard, 15–30 days custom.